Pages

Monday, July 11, 2011

Pumpkin and Lentil Curry

It has been darn near freezing here lately (disclaimer: hyperbole. But it has been colder than usual). I've been eating things other than curries, despite what my blog might suggest, but I've been in one of those wintery ruts where I only cook staples like risotto and soup. I think it has something to do with the fact that all of my beloved food blogs are celebrating summer and fresh berries and salads and I just can't relate to that right now! Which is probably why I jumped at this recipe for pumpkin and lentil curry. Something warm and hearty to cook? Why, sure!

That, and I'd also bought another whole pumpkin for 99c/kilo about three days prior to discovering this recipe, so finding ingredients wasn't exactly an issue.

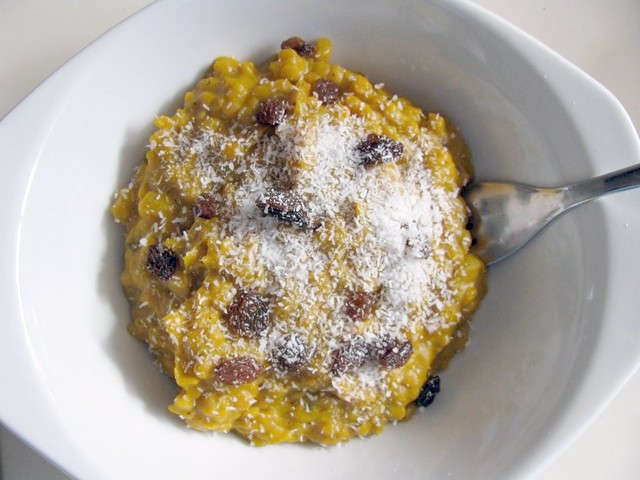
Much like the risotto, this curry is difficult to photograph well, but don't let that put you off! It tastes great, although I'd probably add some other vegetables to it next time for variety and colour. From memory, I used about 500g of pumpkin to make 400ml of pumpkin puree, but I could be incredibly mistaken. I've tried googling to verify if thats a plausible ratio but everyone just says to roast a whole pumpkin and then puree it with no measurements whatsoever.

I also added sultanas and shredded coconut to the top of my curry, something I learnt from Levi's family. I think it added some needed texture to the curry, without it, it probably would have been too bland.


PUMPKIN AND LENTIL CURRY
Serves 4
Total time commitment: 1 hour (20 minutes prep, 40 minutes cooking)
Adapted from Eat Me, Delicious
Cost: 0.98 per serve (0.80 per serve with 99c/kilo pumpkin)

185g red lentils
1 1/2 cups water
1 onion, diced
Ground ginger
270ml coconut milk
500g pumpkin, pureed
Curry powder
Cayenne pepper
Olive oil

1. Heat olive oil in a pan and fry onion until translucent. Add a couple of shakes of ginger (to taste) and fry a further 30 seconds.

2. Add lentils, water, coconut milk and pumpkin, and curry powder and cayenne pepper to taste. Cook over a medium-low heat until the lentils are cooked through (about 40 minutes). If the curry starts to dry out while cooking, add a little water or coconut milk and continue cooking.

Sunday, July 10, 2011

Naan Bread

Obviously, it would be remiss of me to post a gazillion curry recipes without a recipe for naan bread. Like bagels, I didn't make these for a while because of the time commitment, but when I was making the pumpkin and lentil curry and was going to be working for four hours beforehand, I thought it was the right time to make it. I'm very impatient, so being out of the house while dough is rising is really the safest option.

I got this recipe from Nicola's blog, go visit her and bug her to post more stuff.


NAAN BREAD
Makes 6 naan
Total time commitment: 20 minutes prep, 3-4 hours sitting time, 20 minutes cooking.
Recipe from This Is Not An Orange Blog

1 tsp yeast
¾ cup lukewarm water
2 cups flour
1 tsp salt
1 tsp sugar
Pinch of baking soda
2 Tbsp olive oil
2 ½ Tbsp natural yoghurt

1. Dissolve yeast in water. Set aside for 10 minutes or until it starts to foam up.

2. Mix flour, sugar, salt and baking soda in a medium-sized bowl.

3. Add oil and yogurt, and mix to a crumbly dough. When you do it, you'll realise why crumbly is the right word.

4. Add yeast and water mixture and mix to a soft dough. Knead for a while.

5. Return to the bowl, cover with a tea towel, and sit the dough in a warm place for 3-4 hours.

6. Good to see you back! Cover your work space with flour and bring out the dough. Divide into 6 evenly-sized lumps.

7. Roll each lump into an oval.

8. If you are using a frypan, here are Nicola's directions: Heat some oil to very hot in a heavy pan. Chuck in one of the doughvals (hah). It’ll probably stretch out a bit as you pick it up and place it in but that is fine! As it cooks, air bubbles should puff up. Flip over when underside is getting golden brown. Take it out when it looks like naan. Rub with some garlic. Yeaaahhhhh. Repeat with remaining doughvals.

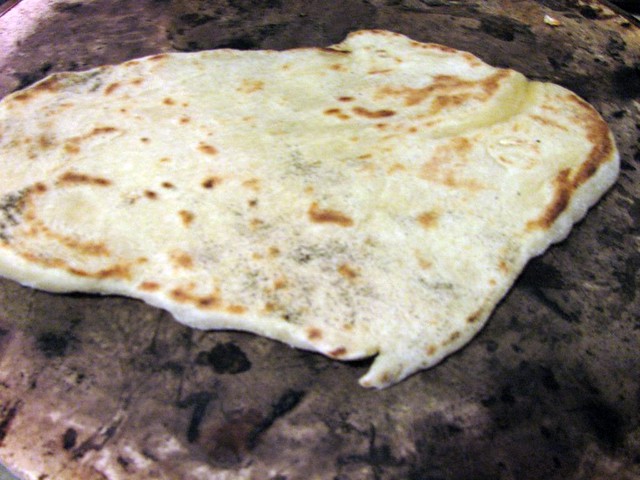
I used a pizza oven instead, so rather than using oil, I floured each side of the bread and cooked it in the pizza oven. It was less puffy and oily (obviously), but still delicious.

Saturday, July 9, 2011

Flatbread with Curry

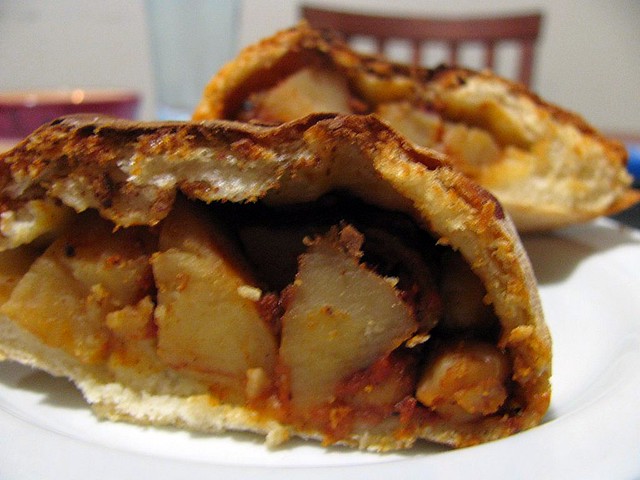
To follow on from the potato and spinach curry the other day, this was how most of the curry was utilised. I love me some (mild) curry, and I also love bread, so this was a pretty natural fit!

I've added a new section just under the recipe title for 'cost'. Because I'm a frugal student, I've started figuring out how much recipes cost per serve. I'm also adding the tags "under $1" and "under $2" for recipes under $1 or $2 per serve. Obviously things will cost different amounts depending on where you live and what's in season, but this is how I've calculated things and its good as a rough guide.


FLATBREAD WITH CURRY
Serves 8
Total time commitment: 2 and a half hours
Recipe from the Kitchn
Cost: $1.37 per serve

1 quantity curry (the curry can be made up to three days ahead)
2 cups warm water
2 tsp yeast
4 1/2 cups flour
2 tsp salt

1. In a medium sized bowl, dissolve the yeast in the warm water. Add the flour and salt and form a dough.

2. Turn the dough onto a work surface and knead until it forms a tacky ball of dough. If the dough is sticky rather than tacky, add some extra flour.

3. Grease a bowl (I used the same one, just cleaned out, because I am lazy and hate dishes) with a little olive oil to prevent the dough from sticking, put the dough in the bowl, cover, and sit for 2 hours to rise. You can also leave it two days in the fridge if your schedule makes that easier.

4. Divide the dough into 8 pieces and roll each into a circle about 20cm in diameter. Place some spoonfuls of curry onto half of the dough and flatten the curry, leaving a diameter. Fold the top of the flatbread over the top and pinch the edges together (like a Cornish pastie).

5. Preheat the oven or grill to about 180C. Leave the flatbread out while the oven/grill is preheating. Cook flatbread until it looks done, essentially. Mine burnt a little on the edges but I feel like that's the equivalent of getting grill marks on it.

Monday, July 4, 2011

Potato and Spinach Curry

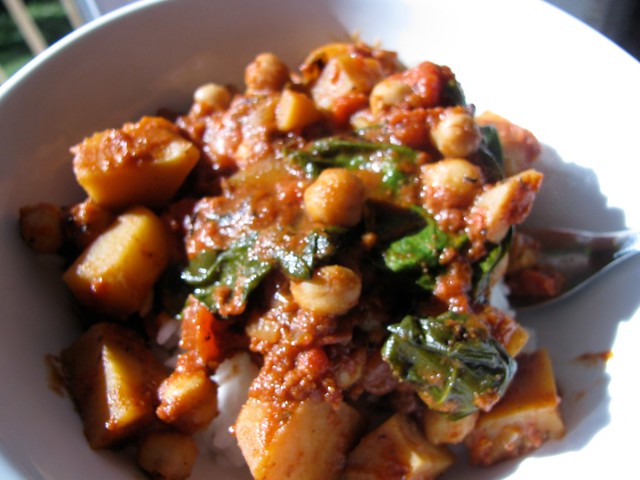
Here is what I like about this curry: All of it.
Here is what I dislike about this curry: Nothing, because I'm not crazy.
If you like curry, and you also like bread, do I have a treat for you this week.

But first - curry! This is delightful, and it makes me happy, particularly now that it is cold and I have lost motivation to cook. That's not entirely true, I've been cooking, but nothing especially interesting, and nothing I haven't blogged before. The last few weeks have been RAH! EXAMS! and then, in my excitement about finishing exams, I had a super-busy first week of holidays. But today, I have nothing planned until 6pm, and that makes me delightfully happy.

Actually, in my busy week, I did have a fun afternoon with Nicola watching Heston's Feasts. That was really fun, and kind of disgusting (boar's head? Dormouse? Ugh).

So back to the curry!


POTATO AND SPINACH CURRY
Serves 8 
Total time commitment: 1 hour
Recipe from The Kitchn


1 onion, diced
450 g potatoes, cubed
3-4 cloves minced garlic
1/2 tsp ginger
2 tsp cumin
2 tsp garam masala
¼ tsp cayenne pepper
2 tsp salt
800g can diced tomatoes
400g can chickpeas
100g baby spinach

1. Heat some oil in a fry pan over a medium-high heat. Cook the onions until browned. Add potatoes and a pinch of salt, and cook until potatoes are almost cooked through but still hard in the centre.

2. Clear a space in the centre of the pan and add the spices with 1 tsp salt. Cook until fragrant and then stir spices into potatoes.

3. Add tomatoes and juices, and simmer the curry, stirring occasionally, until potatoes are completely soft and the sauce has reduced and thickened. Stir in the chickpeas, and then stir in the spinach. If the sauce is still watery, simmer a little longer until thickened.

Sunday, June 19, 2011

Aunty Mel Biscuits

So I don't know if I even mentioned it on the blog, but I went to visit interstate family members in January, and that was pretty rad. I tried to explain my gigantor extended family in December and did a fairly shocking job of it, so to put it simply:
- Big cousin's 21st in Sydney on New Years Eve
- Levi and I took her little sister to Melbourne with us because her parents were going to come over here for my uncle's birthday
- Little Sister Cousin is the same age as Godsister Cousin, who is obviously the daughter of my extraordinary godmother/aunty/all-around cool dude, Aunty Mel.
- Did lots of shopping.

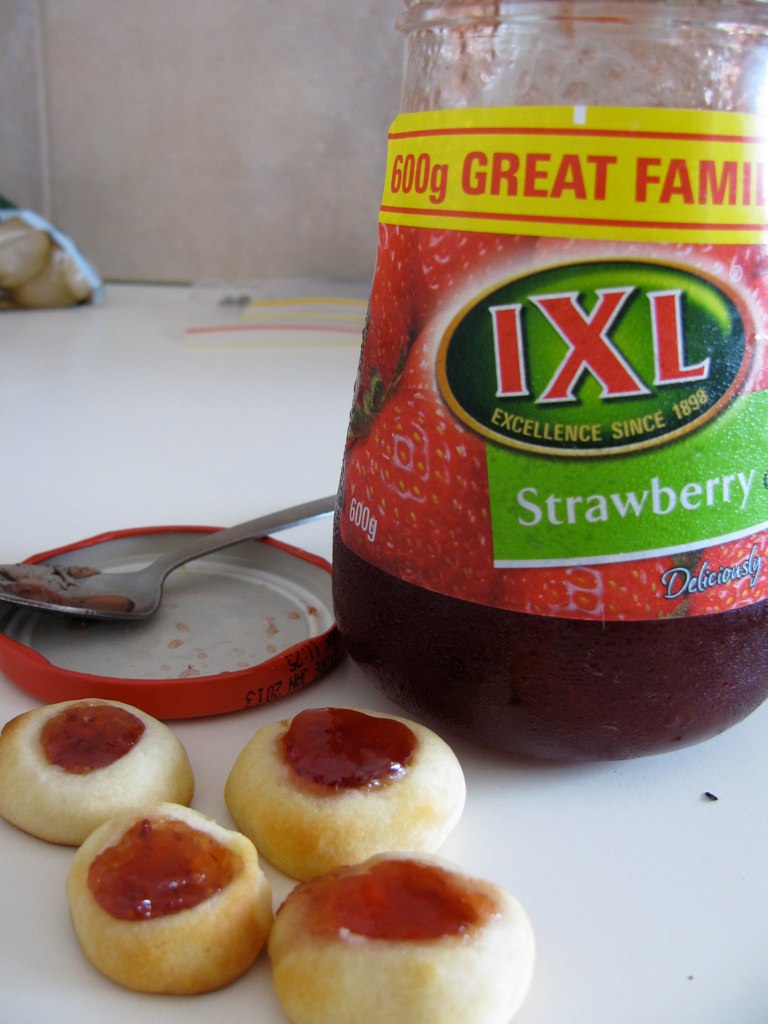
Aunty Mel gave us these biscuits while we were in Melbourne and they were so amazing I took a photo of them. Here they are.


Don't they look delicious? If you answered yes, you are correct. You know what is the best thing about these biscuits? The recipe makes about 100. I'm not even being hyperbolic. I made these biscuits in March, and I just used up the last frozen roll of dough this morning. The dough freezes really well, and not being someone who actually buys biscuits regularly, it was nice to know I had something ready for when Mum and Dad come over, or to take to Grandma's, or whenever I wanted something sweet. I'm not going to lie, I probably averaged an entire log of mixture that was eaten straight from the freezer. Grab a log, unwrap the top, cut a chunk off, eat. I'm such a student.

Oh hey, bag of potatoes and green tea sitting in the background. What up. The tea is Buddha's Tears, if you are playing along at home, and is amazing.


AUNTY MEL BISCUITS
Makes 100
Total time commitment: 20 minutes 
Recipe from Aunty Mel


500g butter
1 cup sugar
400g condensed milk
5 cups flour

1. If you want biscuits soon, preheat the oven to 180C, otherwise you can freeze the dough for a later date. Soften the butter.

2. Cream together butter, sugar and condensed milk.

3. Slowly add flour. If you want to add anything (AM recommendations: choc chips, or coconut and cherries), do it now.

4. Divide into five or so lumps and roll into logs. Roll up the logs in cling wrap, and refrigerate (for now) or freeze (for later). Refrigerating the mixture for five minutes or so makes it easier to work with.

5. Remove your dough from the fridge/freezer. Make sure the oven is at least on, if not preheated, I often let it heat up as I prepare the dough. Line a baking tray with baking paper.

6. Cut off 1cm-ish pieces of dough and roll in your hand until they are malleable. I had to roll the dough then flatten it to warm up the stubborn centre part of the dough-ball, do whatever you need to. If you want to make flat biscuits, flatten the ball with a fork on the baking tray.
For jam-drop biscuits, press a dent into the centre with your thumb and fill with a little jam (too much and it overflows and burns and hurts your tongue when you eat them straight out of the oven).
I've also made these with a sliver of almond pressed into the top and they were good.
Bake until golden but not browned.

Monday, June 13, 2011

Secret Recipe Club: White Chocolate Cheesecakes

So I had a bit of a falling-out with Daring Bakers, mainly that I was struggling to fit everything in with my increasingly hectic life. I know, life's hard. So what did I do to fill the void? Joined another recipe club! This one is the Secret Recipe Club, and every month you are assigned another member's blog to bake something from. Exciting!

I was assigned to Lizzy's blog, That Skinny Chick Can Bake!. If these cheesecakes are anything to go by, she certainly can :) I've actually bookmarked a whole bunch of recipes from her site because it was such a dilemma only picking one. I highly recommend popping over there to check out her stuff.

I haven't edited the recipe much, except substituting Nabisco's Famous Wafers (because I have never seen them before, ever, thanks Australia) for Oreos, removing the Frangelico (because unfortunately, I no longer have mum and dad's alcohol cupboard at my baking disposal) and scaling the recipe down to only use one packet of cream cheese.

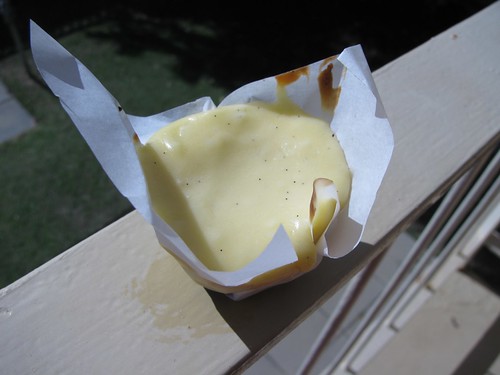
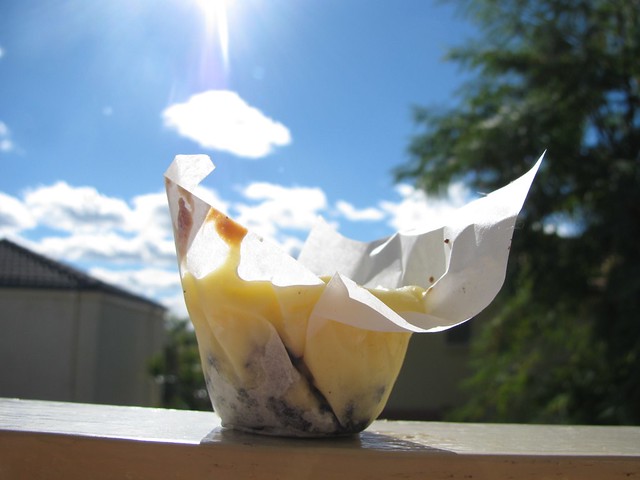
The improvised wrappers are squares of baking paper because, in true procrasti-baking style, I had already started the mixture before I realised I had no muffin tins. They didn't look as adorable but they still tasted great!

Thank you Lizzy, you've gotten me through a very stressful study week with these cheesecakes :P


MINI WHITE CHOCOLATE CHEESECAKES
Makes 18
Total time commitment: 
Adapted from That Skinny Chick Can Bake!

One packet of Oreos (150g)
30g butter, melted
1 1/2 tsp sugar
-----------------------------------
250g cream cheese, at room temperature
1/3 cup sugar
65g white chocolate, melted
1/2 tsp vanilla essence
1 egg, at room temperature

1. Preheat the oven to 180C and line a mini muffin tray.

2. Crush the Oreos and combine with the melted butter and sugar. I may have tasted some at this step, and it might be delicious.

3. Divide the Oreo mixture equally between the muffin holder papers (exam-addled brain, I apologise) and press down into each paper to form a base. Pop them out of the way for a while.

4. In a mixing bowl, and using your electric mixer or some serious elbow grease, mix the cream cheese for about 30 seconds. Add sugar and mix for 30 seconds, then add chocolate and vanilla and mix another 30 seconds. Finally, add the egg and beat until just combined.

5. Spoon the cheesecake filling on top of each chocolate crust, and bake for 12 - 15 minutes until puffed but not golden. Leave to cool, and then refrigerate or freeze, making sure the cheesecakes are covered.


Thursday, June 9, 2011

Apple Crumble

Winter is making me want dessert. I don't know how it does that. Its all cold (yes yes I think 19 degrees is cold) and I want to just go to bed early and get up late and eat lots of food.

That makes it sound like I want to be a bear.

I did buy two apple crumbles before I finally got around to asking mum for the recipe (and her buying me this gorgeous little baking dish for $10 on sale at a cute cafe), and I prefer this one. Also its so easy to make that I probably shouldn't have wasted $6 a pop on frozen apple crumbles. Apples are expensive right now, I'm sure its justifiable, but not after you've learnt this recipe.


APPLE CRUMBLE


Serves 4-6 (depending on how conservative you are with your dessert servings)
Total time commitment: 10 minutes, plus cooking time
Recipe from my mama


4 apples
3/4 cup flour
3/4 cup desiccated coconut
1/2 cup brown sugar
90g butter, melted

1. Preheat oven to 180C. Peel, core and thinly slice the apples. Place them in a microwaveable dish, sprinkle some water on the top, and microwave for 2 minutes until soft.

2. If your microwaveable dish is also oven-proof, great! If not, relocate those apples to an ovenproof dish.

3. In a mixing bowl, combine all of the other ingredients. It doesn't have to be smooth, because its crumble topping. If you eat some, I won't judge you. I used to make bowls of this and eat it when I was at home by myself because thats how I roll.


4. Put the crumble topping on top of the apples and put it in the oven for 10-15 minutes, or until the crumble topping has browned.

5. I would serve this immediately with ice cream, but it does keep in the fridge for at least 24 hours. We've never had one survive longer than that.