Pages

Showing posts with label other blogs. Show all posts

Monday, February 13, 2012

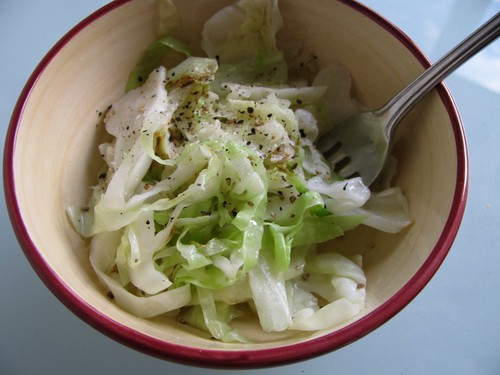
Sauteed Cabbage (Secret Recipe Club)

This month in the Secret Recipe Club, I was assigned to Danielle's blog, Mostly Food and Crafts. I loved loved loved reading through all of these recipes and I was particularly drawn to these mashed potatoes until I realised I don't have the budget for goats cheese (although when I have leftover feta I think I'll give them a go anyway, they look TOO GOOD). In the end, I picked what is maybe the simplest recipe on the blog, sauteed cabbage, and that is just because I've only cooked cabbage one other time and it was spiced so I wanted to challenge myself to cook cabbage and see if I like it. Also because the photo looked amazing and healthy, and the description really sold it to me.

I've just cooked as a snack after work and it tastes amazing. I was a little bit skeptical, and I had a packet of crispy fried noodles on hand just in case I needed to liven things up a bit, but it tasted excellent on its own. I am going to go out on a limb and attribute that in part to the fact that I followed the recipe and seasoned it with salt. For someone as obsessed with hot chips as I am, I don't use salt that much in cooking or to season dishes, but I feel like it gave the cabbage some extra flavour. 

Anyway, make this. Immediately. I'm eating it and its a 37 degree day so you have no excuse for it being too hot (or too cold, but its a warm dish so why wouldn't you?) to make and enjoy this delicious dish. Thanks Danielle! :D


SAUTEED CABBAGE

1/2 head cabbage, sliced thinly
2 tbsp butter
2 tbsp oil
salt and pepper, to season

1. Melt butter and oil in a pan over medium heat
2. Add the cabbage a couple of handfuls at a time, so it isn't going to burn
3. Wait until it is a little softer but still deliciously crunchy, and serve!


Monday, December 12, 2011

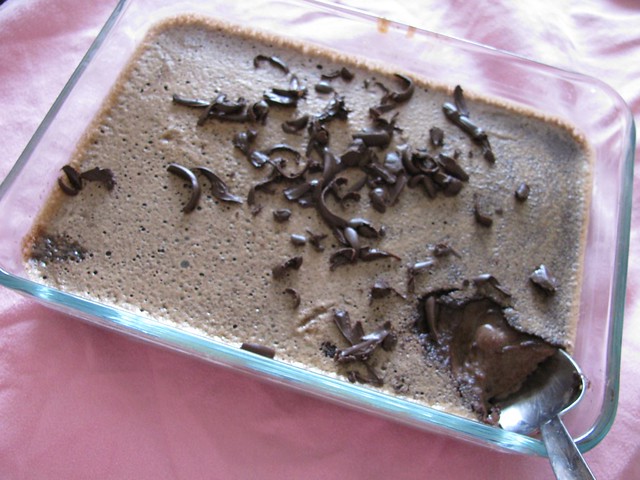
Baked Chocolate Custard (Secret Recipe Club)

Its time for another Secret Recipe Club post! This one was ridiculously last minute because of exams, rehearsals and a trip to Sydney for a three day workshop (and then post-workshop coma), but its here! This month I was assigned to Lavender and Lime, run by the lovely Tandy, and I had a really great time sifting through all of the posts, but I kept coming back to this custard. Which was odd considering I don't normally go for sweet things, but it seemed so delicious.

I am not the kind of girl to own ramekins, so I did batches in a smaller ovenproof dish I already own, and it still worked out perfectly! The only problem was that I found it super difficult to photograph well, so I strongly recommend you head to Tandy's blog and check out her amazing photograph! I'm sure the photo was 90% of my motivation to make this. I grated some chocolate on the top but in this weather chocolate doesn't really grate, it melts between your fingers and the grater. It still tastes great though!


BAKED CHOCOLATE CUSTARD
Serves 6
Total time commitment: 45 minutes (25 minutes baking)
Recipe from Lavender and Lime

100g dark chocolate
515ml milk
100g sugar
6 eggs

1. Preheat oven to 180C. Over a double boiler, melt the chocolate with 15ml milk. When smooth, add to a saucepan with 500ml milk and bring to the boil. Remove from the heat for a bit.

2. Whisk eggs and sugar together until pale and thick. Gradually add milk, continuing to whisk.

3. Place 6 large ramekins into a bain marie (see this post for help) and bake for 25 minutes.

Check out the other fabulous posts here :)


Monday, November 14, 2011

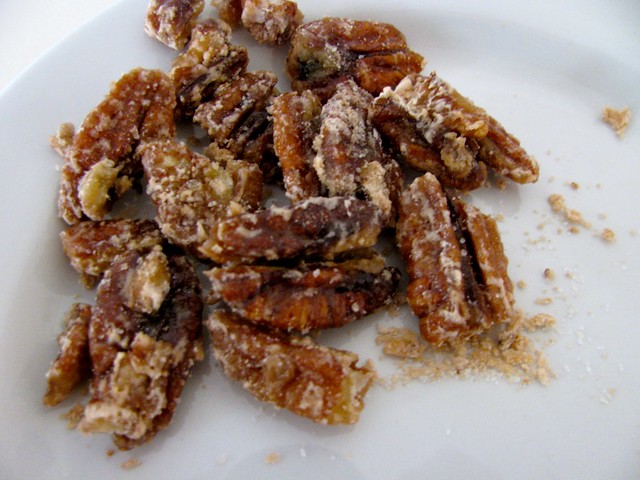
Salted Caramel Pecans (Secret Recipe Club)

It's SRC time again! This month I was assigned to Desi's blog, Steak N Potatoes Kinda Gurl, which I could tell from the title was going to be my kind of blog. Everything looks incredibly delicious, but with Christmas coming up and my intense love of all things salted caramel, I decided to give these salted caramel pecans a try. Levi and I ate these sprinkled over macadamia and honey ice cream and it was essentially the best thing I've ever eaten in the whole world.

Because Desi used pecans in a Christmas recipe (for the 12 Weeks of Christmas Cookies and Sweets), I assume its not just my family who associates pecans with Christmas. When we used to go camping mid-year, Mum would make really boss pecan pies (which I didn't appreciate at the time), and now she makes mini versions to give people for Christmas (which I do appreciate, and try to eat as many as possible). So there's how my mind worked. Good-o.

Salted caramel sounds fancy but this was ridiculously easy, there's just a lot of waiting and watching time. By a lot, I mean about 10 minutes, so not exceptionally long. Comparatively long to how much effort this recipe takes, you can throw the whole thing together in 15-20 minutes, which is just how I like recipes!

I left the cinnamon out of these because I didn't want it to potentially tarnish my salted caramel experience (and pecans are expensive, so I didn't want to risk being sad and having to make more un-cinnamon ones... although I have some leftovers so I might try them with cinnamon later). If you want to add it, though, the original recipe calls for 1/4 tsp ground cinnamon to be added with the salt. I also didn't measure out the salt, I just added it until it tasted good, but I've included the original measurement in the recipe as a guide.

As always, if you want to keep up to date or have a go yourself, the Secret Recipe Club website is here and it is delightful.


SALTED CARAMEL PECANS
Serves 2 - 4, it depends on how hungry you are!
Total time commitment: 15 - 20 minutes
Adapted from SteakNPotatoesKindaGurl

1 cup unsalted raw pecans
1/2 cup granulated sugar
3 tbsp water
1/2 tsp sea salt

Combine water, pecans and sugar in a saucepan over a medium-high heat. When the sugar begins to liquify, start stirring, and keep stirring until the sugar begins to crystallise.

Bring the heat down to medium-low and continue stirring. When the sugar is getting to the level of brownness that you would like, start coating the pecans with it (I used a wooden spoon). When the pecans are coated, sprinkle salt (and cinnamon, if you're using it) over them and leave to cool on a baking sheet.

Have a look at what everyone else has done here:


Monday, October 31, 2011

Spiced (The Kitchen Reader)

It's time for another Kitchen Reader book! This month's was Spiced: A Pastry Chef's True Stories of Trials By Fire, After-Hours Exploits, and What Really Goes On in the Kitchen by Dalia Jurgensen, chosen by Libbi of Domestic Wandering.


I wasn't expecting to like this book, because for some reason I thought a memoir would be boring. And yes, some bits I wasn't too interested in the outcome of (relationship stuff? Surprisingly not my thing), but generally it was great. It actually made me want to become a pastry chef, until the rational part of my brain piped in with "No Emily, we've already done that and it wasn't as fun as you expected". Which brings me to the point that I don't think I've ever mentioned on my blog that I started a traineeship with an Italian pastry chef. But I digress!

The whole leaving-my-desk-job-to-pursue-my-dream thing is a bit hackneyed, but I wasn't quite as irritated by it in this book because it's actually real life, not a terrible film storyline. It also seems like nobody ever learns anything in culinary school that is of real value to working in a professional kitchen. Regardless, I really enjoyed the book, and got through it exceptionally quickly, which probably means I was more sucked in to the story than I anticipated. I would recommend this to anyone who is curious about what its like working in a kitchen. In my experience, the chauvinism and dysfunction are a bit hyperbolic in the book, but its definitely a good read.

THREE OUT OF FIVE WHISKS.

Monday, October 17, 2011

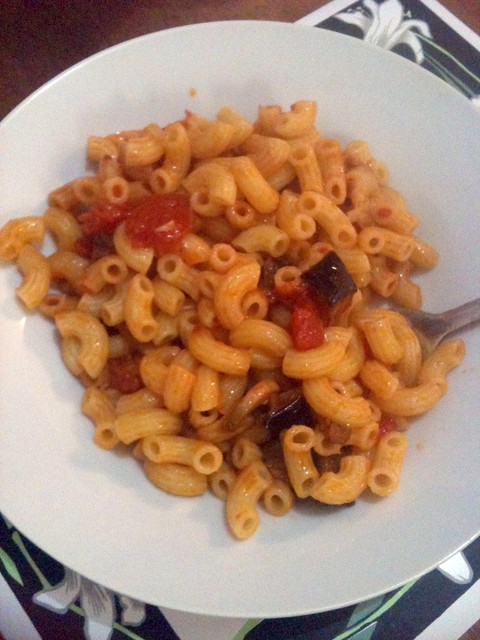
Roasted Eggplant and Tomato Pasta (Secret Recipe Club)

SRC time again, already! Having something to do every month really makes me realise how little I post on my blog. This month I was assigned to Ethan's blog, Food in My Hands. I spent the better part of the month trying to decide what to make, everything looks so good. First it was Maple Swirl Bread, then White Chocolate and Cranberry Cookies, then Veggie Meatballs with Roasted Red Pepper Sauce... in the end, though, I settled on roast eggplant and tomato pasta. Because I love me some pasta, and I was keen to try roast eggplant. I made this for dinner at the Friendzone, so instead of adding sausages (because Levi is a vegetarian and veggie sausages are expensive!) I substituted them for mushrooms, and I think it worked out delightfully. I also substituted fresh tomato for tinned diced tomato, thats just because I am lazy. Also tomatoes are expensive at the moment, who knew?

As always, the Secret Recipe Club website is looking delightful and you should head over there.


ROASTED EGGPLANT AND TOMATO PASTA
Serves 4
Time commitment: 40 minutes roasting, 20 minutes actual work
Recipe from Food In My Hands
Cost: $1.82 per serve. 


500g pasta (I used elbow pasta, but I'm sure anything would work)
1 large eggplant
6 mushrooms
400g can diced tomato
Olive oil

1. Preheat oven to 180C. Cube the eggplant and put it in a roasting dish with a generous amount of olive oil. Cook for about 40 minutes or until roasted, flipping halfway to make sure its all even. Well, as even as it will get. Fun fact: Smaller cubes that have lots of olive oil go really crispy and are fun to eat straight out of the oven.

2. Slice mushrooms and fry in a little olive oil until browned. Turn heat to medium-low, add diced tomatoes, and heat. Add eggplant and let the sauce thicken.

3. At this point, you can cook the pasta and serve it, or refrigerate the sauce for later. I haven't tried freezing it yet, I'm not sure about how it would go with the texture of the eggplant, but I made mine before uni and threw it in the fridge until dinner and it turned out fine!


Monday, June 13, 2011

Secret Recipe Club: White Chocolate Cheesecakes

So I had a bit of a falling-out with Daring Bakers, mainly that I was struggling to fit everything in with my increasingly hectic life. I know, life's hard. So what did I do to fill the void? Joined another recipe club! This one is the Secret Recipe Club, and every month you are assigned another member's blog to bake something from. Exciting!

I was assigned to Lizzy's blog, That Skinny Chick Can Bake!. If these cheesecakes are anything to go by, she certainly can :) I've actually bookmarked a whole bunch of recipes from her site because it was such a dilemma only picking one. I highly recommend popping over there to check out her stuff.

I haven't edited the recipe much, except substituting Nabisco's Famous Wafers (because I have never seen them before, ever, thanks Australia) for Oreos, removing the Frangelico (because unfortunately, I no longer have mum and dad's alcohol cupboard at my baking disposal) and scaling the recipe down to only use one packet of cream cheese.

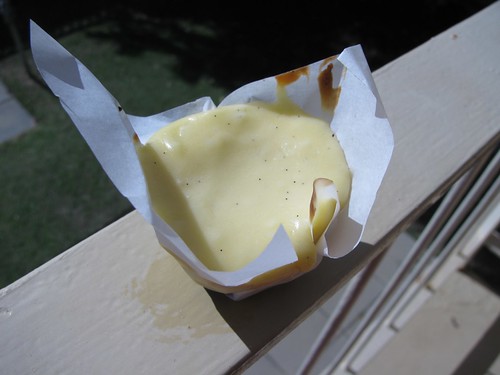
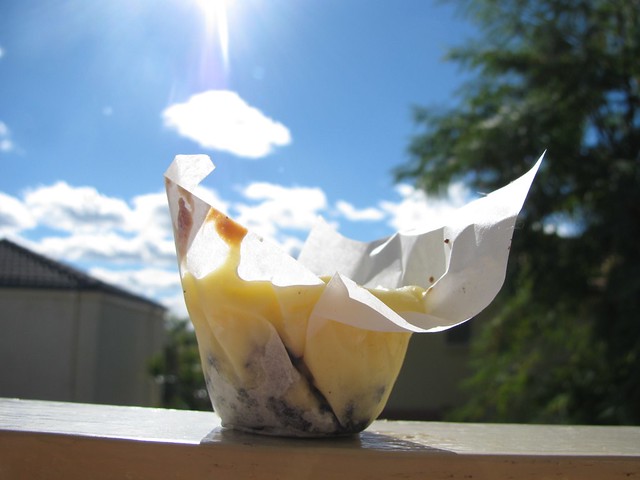
The improvised wrappers are squares of baking paper because, in true procrasti-baking style, I had already started the mixture before I realised I had no muffin tins. They didn't look as adorable but they still tasted great!

Thank you Lizzy, you've gotten me through a very stressful study week with these cheesecakes :P


MINI WHITE CHOCOLATE CHEESECAKES
Makes 18
Total time commitment: 
Adapted from That Skinny Chick Can Bake!

One packet of Oreos (150g)
30g butter, melted
1 1/2 tsp sugar
-----------------------------------
250g cream cheese, at room temperature
1/3 cup sugar
65g white chocolate, melted
1/2 tsp vanilla essence
1 egg, at room temperature

1. Preheat the oven to 180C and line a mini muffin tray.

2. Crush the Oreos and combine with the melted butter and sugar. I may have tasted some at this step, and it might be delicious.

3. Divide the Oreo mixture equally between the muffin holder papers (exam-addled brain, I apologise) and press down into each paper to form a base. Pop them out of the way for a while.

4. In a mixing bowl, and using your electric mixer or some serious elbow grease, mix the cream cheese for about 30 seconds. Add sugar and mix for 30 seconds, then add chocolate and vanilla and mix another 30 seconds. Finally, add the egg and beat until just combined.

5. Spoon the cheesecake filling on top of each chocolate crust, and bake for 12 - 15 minutes until puffed but not golden. Leave to cool, and then refrigerate or freeze, making sure the cheesecakes are covered.


Tuesday, June 7, 2011

Penne alla Vodka

My friend Sian, who is one of the most delightful people ever, posted this on her blog a year ago and its taken me this long to get around to making it. I'd had it once before from a restaurant, and I remember enjoying it, so I figured it couldn't go too badly.
SPOILER: I WAS RIGHT.
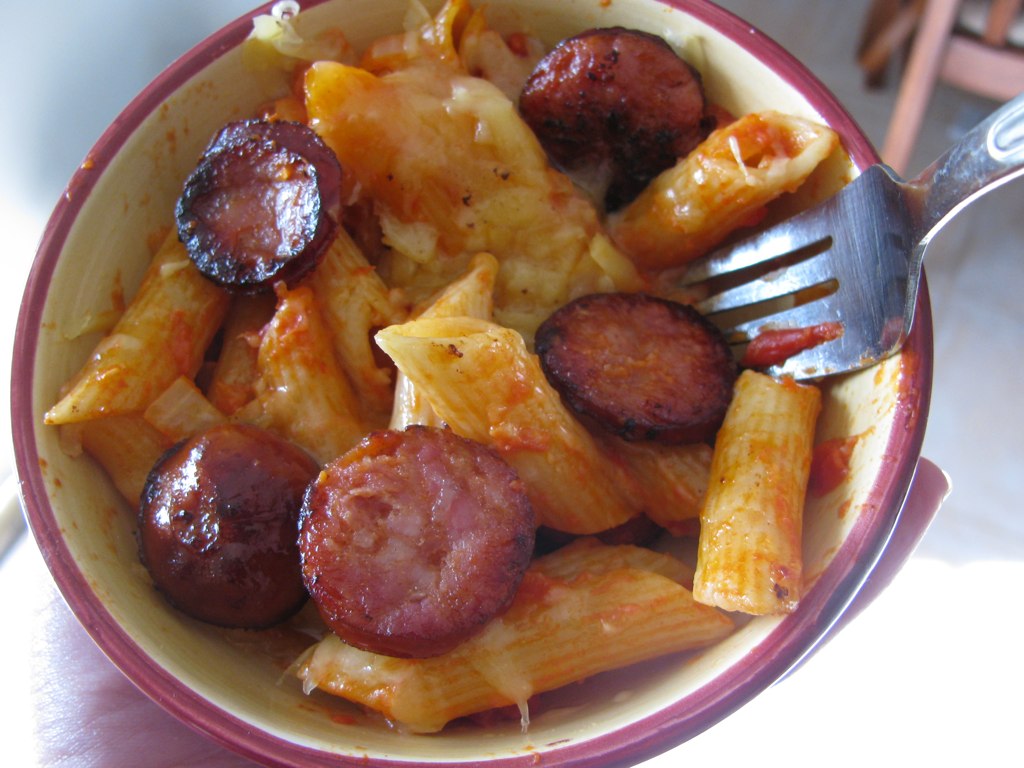
Aside from not mixing it very well, so I occasionally had a big vodka-y bit of pasta that made me choke a little, it was really delicious and I will make it again, vodka permitting. Although I wouldn't put it past me to buy vodka specifically for cooking this. Pasta + cream + parmesan = the best. Siany's recipe was vegetarian, but I googled around a bit and people seem to like putting bacon in it, so I settled for chorizo because it was on special and I was not disappointed.

The second time I ate it (leftovers for lunch the next day) I used regular cheese instead of parmesan, and it was delightful.


PENNE ALLA VODKA
Serves four
Total time commitment: 30 minutes
Recipe from Monster Girl Writes

1 onion
400g can diced tomatoes
Herbs (Sian recommends oregano and basil)
200g penne
Olive oil
Garlic
2 Tbsp thickened cream
2 Tbsp butter
1/4 cup vodka
Parmesan or another form of cheese
Chorizo (optional)

1. Put water for the pasta on to boil. Heat the oil and garlic in a pan, finely dice the onion and cook until golden.

2. Add pasta to boiling water. Meanwhile, add the can of diced tomatoes and herbs to the onion mixture, and cook until heated through. This should take about ten minutes, roughly the same time it will take for your pasta to be al dente (fancy way to say cooked but chewy).

3. If you're using chorizo, start cutting this up and frying it now while you drain the pasta, because the part of the stove you just cooked the pasta on is still hot so you won't waste time heating a third thingy. We're all about technical terms in this kitchen.

4. Return the drained pasta to the pan and stir through the butter so the pasta is coated. Add the vodka to the pasta and mix, then add the tomatoey, creamy sauce. Combine everything, serve into bowls, and top with parmesan or other cheese and chorizo, if you're being that kind of awesome.

Sunday, April 10, 2011

Not Your Mama's Pop Tarts

Actually, these probably would be my Mama's choice of Pop Tart, if the choice is between these and the saccharine toaster things.

The pie crust dough is definitely one of the baking basics you should remember. It was delicious and buttery and easy. I'm not actually that big on pie, but winter is coming so I've stored it just in case! In going back to get the links for the pie crust and that, I found the Smitten Kitchen pop tarts recipe. Stay tuned, fellas, because I wanted to make Nutella pop tarts anyway and I think that will be my vehicle to try them.


POP TARTS
Makes 10 small or 6 large
Total time commitment: 
Assembly idea from Chez Pim, dough recipe from Smitten Kitchen

2 1/2 cups flour
1 tbsp sugar
1 tsp salt
225g cold, unsalted butter
1 cup water
Filling - I used strawberry jam, but I think Nutella would be equally delicious.

1. Throw some iceblocks into your 1 cup of water. I don't know the science behind this, or why it is useful, but thats what the recipe said. Leave that to sit until you need it. If you're in WA at the moment, it will take approximately three seconds for the ice to melt because it is SO. DARN. HOT.

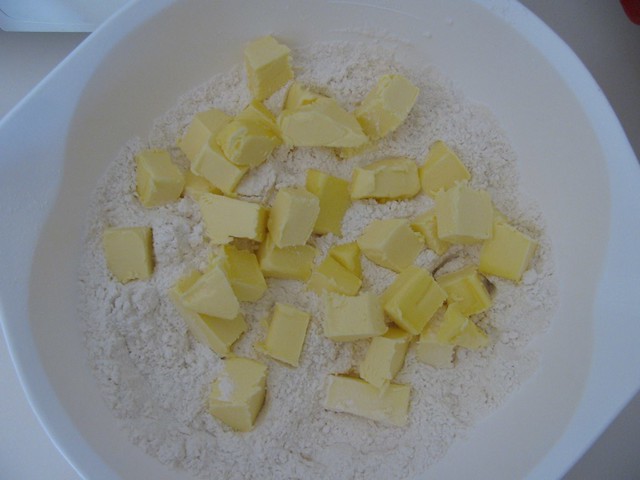
2. Combine flour, sugar and salt in a large bowl. Cube the butter, add it to the dry ingredients, and mix it in with your fingertips. If you want to get all fancy, Deb uses a pastry cutter, but I find that BRUTE STRENGTH is equally easy.*

*I have never used a pastry cutter, so it probably is easier. Carry on.


3. When the butter is kind of pebbly and the size of small peas (or larger, if you're me and have neither the aforementioned brute strength or pastry cutter and a penchant for laziness), add half of the water. If the ice cubes haven't melted by now, for the love of goodness, take them out. Use a spatula to gather the dough together, and add more water a tablespoon at a time until you can get the mixture into one big, doughy lump (by this stage I had given up on the spatula and used my hands).

4. Divide the dough into two and wrap each piece in cling wrap. Chill in the fridge for two hours. I mean chill the dough, not that you personally should chill in the fridge.

5. Hello! Welcome back. Can you please put the oven on to 180C? Cool. Grab your dough from the fridge, break off a piece and roll it out to your desired thickness. As I don't have a rolling pin, I just patted it out to a fairly substantial thickness. If it's too small for your pop tart (you'll fold it in half), roll it back up and add more dough before rolling it out again. This is cooking, people, not rocket science.


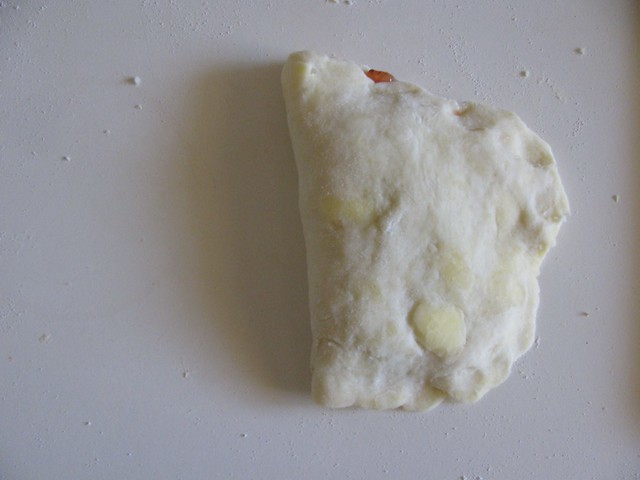
5. Spread half of your dough-rectangle with filling, leaving a border around the edges so it doesn't smoodge out like in the picture. Fold the other half on top so you have a little parcel, and seal the edges by pressing down with a fork. Poke some holes in the top so it can breathe, and put it in the oven. I judged their "done-ness" by colour, and I could have probably left them in a little longer.

Monday, April 4, 2011

Cooking With Charlie

In the absence of any *actual* blog, because Panto and an essay on the social discourses shaping our view of the female gender and how we as a society react and respond to these discourses (still with me?) are eating my life, watch this funny video by a funny man who says almonds funny.

Levi says cashews funny though, kind of how you would pronounce "a-choo!" but "ca-shew!". In retrospect, he just places the emphasis on the second, rather than first, syllable.

Back to my essay. Tra la la.

Friday, March 18, 2011

Gluten Free Friday: Lentil Loaf and Bento Boxes

I've developed a sort of system to get me through the weeks now that uni is back on, and I still have work and panto and bi-weekly sewing days at Grandma's (which is where I'm headed this afternoon and I can't wait!).

Actually, before I get onto that, I've had a quest for about six months to buy a bento box. It started out as an "Oh, wouldn't that be cool?" idea, then Tara gave me Lunch box Revolution for Christmas.


I was totally sold on the idea when Levi and I went into (probably) every Morning Glory store in Sydney and Melbourne, but I *still* couldn't find one that was exactly perfect. Then I got home and looked on a bunch of websites, until finally I realised that eBay would probably help. Help it did, my friends! On Monday, my bento box arrived and it is splendid. I recently bought a satchel for uni, and this is so much more spatially economical than three different containers (which means the bag actually closes, something I thought I might never see). Also, so many adorable bento accessories! So this is my new lunchbox (don't even get me started on the quest before this for a regular lunchbox):

As you can see, its from eBay seller blueberryland, and I had absolutely no problems with them. Free P&H? WHEN YOU'VE MADE THE SALE, STOP SELLING! Although, I would recommend getting one with a fork, or having a miniature fork that fits in the fork section, but if you don't its a good place to sneak some biscuits or other reasonably flat treats. 

So we're all sold on the idea of a bento box, or at least a reasonable lunchbox? Good good. Let's get on to my brilliant system then. 

As I briefly mentioned with the pumpkin scone recipe, some days you just need to grab and run when it comes to breakfast. For me, thats Thursdays when I start uni at 8:30 and need to get the bus by 7:15. Wednesdays aren't *too* much better - I start at 9:30 but I'm normally rushing around printing lecture notes so I don't have time to cook breakfast. Both of these days are pretty full-on as well - Wednesday I have uni 9:30 - 4:30, and Thursday 8:30 - 5:30 (with a four-hour gap in the middle on Thursdays, remember I'm doing an Arts degree!). So the system: Spend Monday and Tuesday, when I'm essentially free until 3:30, cooking lunch and breakfast for the week. 

(This is all relevant, I promise)

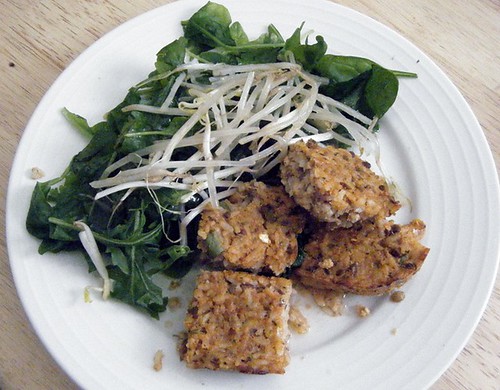
This week's lunch was lentil loaf! Hurray, relevance! This is a great recipe because you can make it quite easily and add a whole bunch of stuff or make any amount of substitutions (some are included in the notes at the end). I've made it twice, the first time I added red kidney beans and mushroom, and the second time I added cooked sweet potato. Good. Times. 

Also, The Uber-Blonde is a benevolent blogger and let me use her photo because I managed to forget all week and now its all eaten up.


LENTIL LOAF
Makes 10 serves
Total time commitment: 30 mins prep, 45 mins cooking time
Recipe from Baking It, who adapted it from Eat Me, Delicious

1 can cooked lentils, drained (or 1 1/2 cups cooked lentils)
2 cups rice
2 cups grated cheese
1 cup tomato sauce
4 eggs, lightly beaten
4 tsp soy sauce
2 tsp minced garlic
Herbs to season
Any additions you may have

1. Preheat oven to 180C and grease a large baking dish. 

2. Combine all ingredients in a bowl and pour into the baking dish. 

3. Bake for 45 minutes. Cool for 5 minutes before cutting and serving. 


NOTES/SUBSTITUTIONS: 

- Rice can be substituted for oats, millet, bulgur. Obviously oats aren't GF, so don't do that if you are intolerant, you nong.
- Tomato sauce can be substituted for BBQ sauce, salsa
- Substitutions looks like it has too many t's
- Nutritional info (per serve): 185.3 cal, 6.7g fat, 1.8g sugar 

Friday, February 25, 2011

Chickpea Salad Dressing

Have you checked out Shutterbean? I have me some ridiculous amounts of love for that blog, you don't even know, and it all started out with the link to some biscuits. I was like, cool, I'll bookmark that, you know, maybe even check out the archives a bit. BAM! Hours of life gone, loads of recipes bookmarked, lots of smiling reading through Tracy's posts.

As you have *probably* guessed from that intro, this is one of the aforementioned recipes.

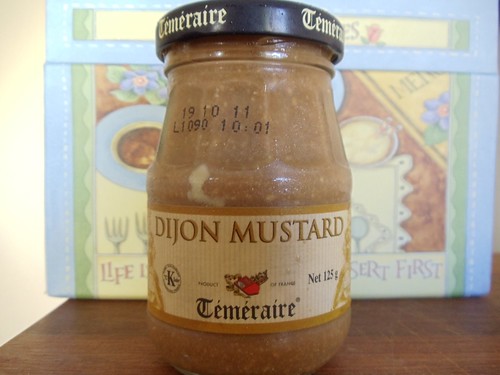
I must admit, I'm not really one for salad dressings, but this one really bumped up the salad from a simple, chucked-together side dish to something a little fancier. Because I was literally scraping the jar of Dijon mustard to get the required amount, I poured the leftover dressing into the jar and shook it up so I didn't waste any Dijon. Resourceful, eh?


CHICKPEA SALAD DRESSING
Original recipe from Appetite for Reduction, adapted by Shutterbean
Serves 8 as a side salad or 4 as a main meal
Total time commitment: 15 minutes


SALAD:
400g chickpeas
2 cups pearl cous cous, cooked
Other salad ingredients

DRESSING:
1/4 cup cashew pieces
1/2 cup water
1/4 cup balsamic vinegar
2 tsp Dijon mustard

1. Place cashew pieces in a food processor & blend until chopped. Add the rest of the ingredients and blend until smooth - as you can see from the photo, I didn't have that sort of patience!

2. Toss dressing with salad ingredients and serve.

Saturday, January 22, 2011

Gluten Free Friday: Link party!

I know, I'm a day late, but stuff has been happening and I can't find the measurements for the GFF recipe I am still to post, I'm sorry. So feast your eyes on these delightful gluten-free wares in the meantime!

Sweet Potato Fries from Gluten-Free Goddess


Fudge Mint Brownies from Gluten Free Diva


Custard Tarts from Canelle et Vanille


Saturday, January 1, 2011

Gluten Free Friday: Creme Brulee

HOW EXCITING, I've finally gotten around to doing a ~regular~ posting series, and even more exciting, its devoid of gluten!

(Don't hold your breath on the regularity, but I'll do my best)

I was hoarding a bunch of recipes to do gluten-free week and post a whole bunch of things, but then I thought, thats boring. There are so many delicious GF recipes around on the internet, I may as well share some with you (and the Uber-Blonde and Vigilante, both of whom are intolerant to gluten, KEEP UP WE'VE BEEN THROUGH THIS).

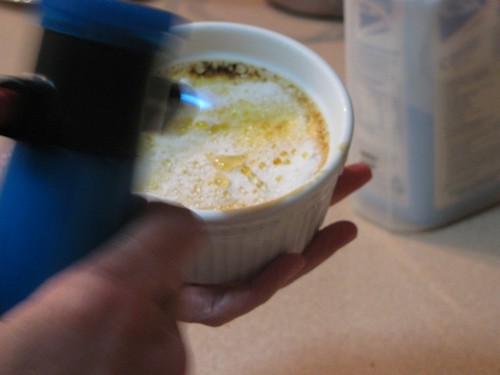
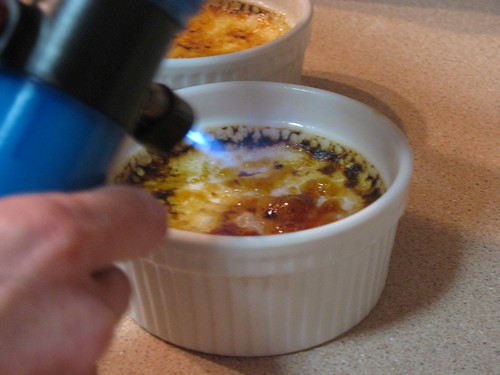
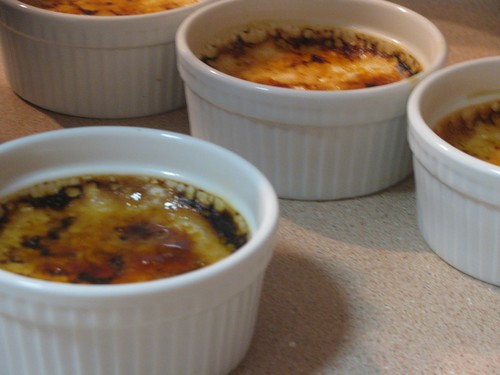
So because you need something decadent for your weekend, the opening dish is a good old Creme Brulee from everyone's favourite Pioneer Woman. If you head over to her blog, firstly it is incredible, but secondly, she has step-by-step pictures which make it seem a lot less daunting.

I had a nice bonding experience with Mum cooking this, because I bought her a kitchen torch for her birthday last year and it took her almost a year to use it (I think forwarding the recipe to her when it was published online may have been a subtle hint?). It was well worth it, though. Especially for this:

Me: "Ok, then she skims the foam off the top and eats it."

Mum: "Really?"


And then she tried it, and yea, it was delicious.


CREME BRULEE
Recipe from The Pioneer Woman

4 cups heavy cream
1 tbsp vanilla extract (or 1 whole vanilla bean, or 1 tbsp vanilla paste)
10 egg yolks
3/4 cups sugar
6 tbsp caster sugar


1. Preheat oven to 160C (325F).

2. Pour cream and vanilla into a saucepan and simmer over a medium-low heat.


3. Whip egg yolks and sugar in a separate bowl until thick and pale yellow.

4. Strain the cream using a fine strainer - I think we used muslin (fancy!)


5. Drizzle 1 cup of the cream into the egg yolks, whipping as you go. Slowly add the rest of the cream.

6. Place your baking dish (ideally ramekins, so I'll say that for the sake of convenience, but we cooked some in glass baking dishes) onto a rimmed baking tray. It needs to have a rim because once you've poured the custard mixture into the ramekins (do that now!), you need to pour water into the baking tray until it comes halfway up your ramekins.

7. Bake for 30 minutes, but make sure they do not brown on top. Allow to cool, cover with plastic wrap and chill for at least two to three hours.

8. Ready to serve? Excellent. This is the fun bit. Sprinkle 1 tbsp sugar over each ramekin (or equivalent - if you used two baking dishes, do 3tbsp each, use common sense). Then use the kitchen torch to burn the sugar to a nice, crisp layer on top. Serve immediately, and its fun if you crack the top with a spoon a la Amelie.


Sunday, December 19, 2010

Boysenberry Crumble Bars

Its not a secret that I love Christmas. I think I love it only 0.5% less than Tara, and thats saying something. In fact, I'm so delirious with Christmas joy that I tried to link to www.tara.com. Which is not her blog at all. Or maybe its the heat thats making me delirious. I don't know. It must be over 40 today, right guys?

(Note: The Bureau says its forecast at 32. I say that's a lie.)

I had a very nice baking day with The Uber Blonde earlier this week. If you've been following her blog (and if not, why not!?), you'll know that she's recently had to join the ranks of The Vigilante in gluten-free-ness. I was going to nickname The Vigilante as Allergen Girl because she's SO DIFFICULT TO BAKE FOR with all her intolerances (just kidding, I love you really), but I drew her as a superhero vigilante once and it made me pleased.

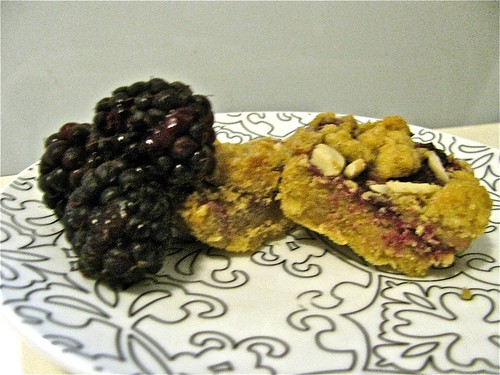
So UB and I made these delightful crumble bars from this gluten free recipe, although we made some substitutions (almond meal for hazelnut flour, a lot less jam than we needed, no vanilla essence - although the latter was just because I've lost it. The essence, not my mind. Or... never mind). They were gosh-darn delicious, so when Dad came to stay with us and brought some boysenberries with him, I snapped up half of them to make a glutenous version of the bars. Mmm, wheat.

I'm going to warn you - these bars are decadent. Not quite in a Cinnabon-y way, but in a "share with a large group of friends or eat over two weeks" way. I know the recipe looks complicated, but it really isn't! Trust me, I am not one for difficulty, and definitely not twice in two days.


ELDERBERRY CRUMBLE BARS
Makes 24 slices
Adapted from Gluten-Free Goddess

1 1/2 cups plain flour
1/2 cup almond meal
1 cup brown sugar
1/2 tsp sea salt
1/4 tsp baking powder
1/8 tsp nutmeg
3/4 cup unsalted butter
-------------------------------
1/2 cup boysenberries
-------------------------------
1/2 cup flour
1/2 cup brown sugar
5 tbsp butter
-------------------------------
2/3 cup slivered almonds*
4 tbsp butter


*in the GF bars I made with UB, we used dessicated coconut as well (the original recipe calls for flaked coconut, but beggars students can't be picky) and it was amazing, so I'd strongly encourage that, I was just lazy the second-time around when I actually took a photo.

1. Preheat oven to 180C.

2. Combine all ingredients from the first section except the butter. Then cut in the butter to a sandy consistency.

3. Line a baking pan with baking paper, allowing some overhang so you can just lift the bars out when you're done. Pour in the mixture and pat down to make a firm base. Bake for seven minutes in the preheated oven to "set" the base.

4. Take the base out and "smash" the elderberries to make a layer across the base. As a reference point - in the original recipe, jam is used as the middle layer, so you want a fairly thick filling or it will just be crumble on crumble.

5. Speaking of that second layer of crumble - combine the flour and brown sugar, and rub in the butter to create a crumble. Top the elderberry layer with crumbly goodness.

6. Melt the 4 tbsp butter gently in a pan, and coat the slivered almonds in butter. Spoon this mixture onto the top of the crumble.

7. Bake for 20 minutes, then transfer to a wire rack to cool.

The original recipe says you can bag and freeze leftover bars - I can't vouch for this as I haven't had any leftover as of yet, but I trust her!

Wednesday, December 15, 2010

Christmas Joy

I can't even explain why I haven't been posting. I think it has something to do with laziness, forgetting to take photos, and production week. Ah, production week. My nemesis. But its almost Christmas, I've nearly finished my shopping, and work is over. So hopefully this gets you in the Christmassy mood, because I gosh-darn love Christmas :)

What I'm Listening To: Fairytale of New York by The Pogues.


What I Desperately Want: These fantastic gingerbread biscuits from A Work in Progress


And if I play my Christmas list (or new year presents-to-self) right, I could make some with these


Antidotes to all of the food I'll be consuming over Christmas:

This gorgeous gingerbread house ring from DIVINEsweetness. The details! The photography! I am in love.

Or these macaron rings from shayaaron - lemon & lime, menthe, blackcurrant, or praline. Learning to make macarons PROPERLY, with feet, is my challenge for 2011. 


Stepping away from food for a second, I LOVE this headband from Janine Basil. And speaking of challenges for 2011, I also need to learn how to use liquid eyeliner. 


OK, back to food. I want Jacques the French Toast and his baguette buddy! (*Not a euphemism) From Pumpkin Pye.


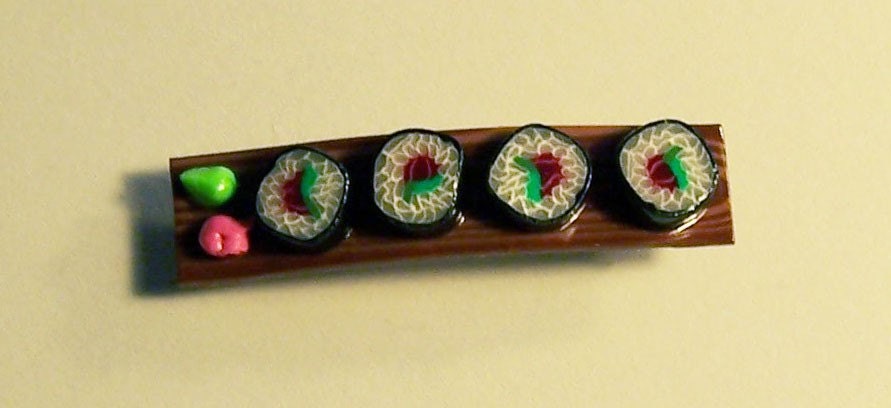
What is happening with this sushi hair barette/why don't I ever pin my hair back? Gimmeswords, you have my undying love.


Any other cute food finds?

Friday, November 26, 2010

Simply Breakfast

I stumbled across this site today (while eating my own, sub-par breakfast). It makes me want to get up earlier and cook delicious breakfasts every day!

All photo credits to Jennifer Causey at Simply Breakfast


Tuesday, November 9, 2010

Play with your food!

How adorable is this, from Cooking with Gina Lee? I want Jack and Zero lunch!

(now back to study. Philosophy will be the death of me!)