Pages

Monday, February 13, 2012

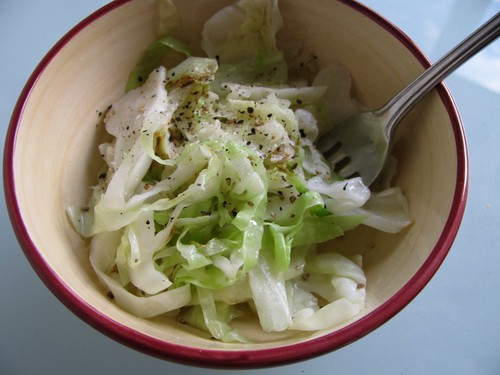
Sauteed Cabbage (Secret Recipe Club)

This month in the Secret Recipe Club, I was assigned to Danielle's blog, Mostly Food and Crafts. I loved loved loved reading through all of these recipes and I was particularly drawn to these mashed potatoes until I realised I don't have the budget for goats cheese (although when I have leftover feta I think I'll give them a go anyway, they look TOO GOOD). In the end, I picked what is maybe the simplest recipe on the blog, sauteed cabbage, and that is just because I've only cooked cabbage one other time and it was spiced so I wanted to challenge myself to cook cabbage and see if I like it. Also because the photo looked amazing and healthy, and the description really sold it to me.

I've just cooked as a snack after work and it tastes amazing. I was a little bit skeptical, and I had a packet of crispy fried noodles on hand just in case I needed to liven things up a bit, but it tasted excellent on its own. I am going to go out on a limb and attribute that in part to the fact that I followed the recipe and seasoned it with salt. For someone as obsessed with hot chips as I am, I don't use salt that much in cooking or to season dishes, but I feel like it gave the cabbage some extra flavour. 

Anyway, make this. Immediately. I'm eating it and its a 37 degree day so you have no excuse for it being too hot (or too cold, but its a warm dish so why wouldn't you?) to make and enjoy this delicious dish. Thanks Danielle! :D


SAUTEED CABBAGE

1/2 head cabbage, sliced thinly
2 tbsp butter
2 tbsp oil
salt and pepper, to season

1. Melt butter and oil in a pan over medium heat
2. Add the cabbage a couple of handfuls at a time, so it isn't going to burn
3. Wait until it is a little softer but still deliciously crunchy, and serve!


Monday, January 9, 2012

Happy 2012!

Hello!

I've been remarkably busy doing what seems to be not much, but it has been a very enjoyable break. Christmas was delightful, I spent Christmas Eve with my big sister at her house, Christmas Day with my family, and Boxing Day with Levi's family (who were kind enough to pick me up from the train halfway, which meant I could still spend the morning with my aunty & co who were over from interstate rather than taking a different train the whole two hours at 9am, so props to them) and then a nice break between Christmas and New Years with Mum and Dad. I even had a friend's 21st on New Years' Eve, which was amazingly fun, I've known her since pre-primary (so about fifteen years!) and I don't see her nearly enough any more.

Oh, and before that we had a big Christmas dinner for our volleyball team, which I fully intended to blog about but I caught a cold during the Christmas Pantomime and ended up sleeping through most of the dinner. After my team had won at charades. And after I had downed an egg nog much faster than anyone else, because the cold meant that I couldn't taste the rum in it.

I was also incredibly spoilt over Christmas, some food-related highlights:

A new kettle. I went from a stovetop kettle to a secondhand kettle and now THIS. 

Also this necklace. I want to wear it everywhere. 


And these books from Levi, which I would thoroughly recommend to absolutely anyone with even a passing interest in cooking. 


I don't think I've mentioned how much I love Heston Blumenthal on my blog, but I think he is amazing and I am very glad Mum made me watch Heston's Feast with her one night (the Willy Wonka episode, which is still one of my favourites) because then it made sense that we had given someone the Fat Duck Cookbook as a birthday present (side note: my 21st is soon. Compleeeetely unrelated side note...). The Flavour Thesaurus is great because I'm never sure what to pair things with so I usually end up following recipes or sticking to safe combinations and now I have an entire reference book to choose food pairings from! :D

I feel like we're pretty caught up now. I hope you had a splendid break too. Your hair looks good today.

Monday, December 12, 2011

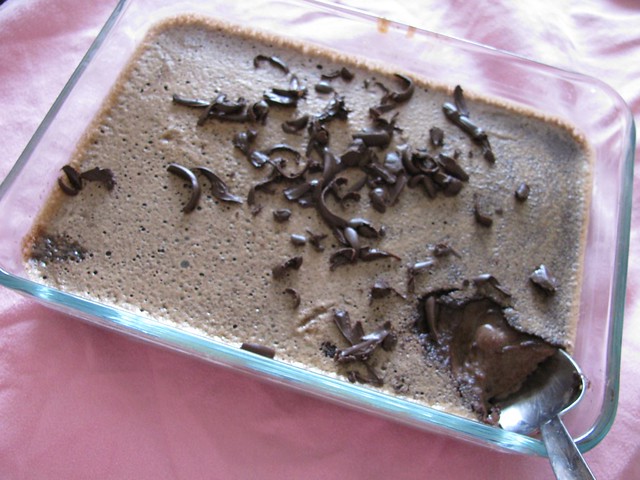
Baked Chocolate Custard (Secret Recipe Club)

Its time for another Secret Recipe Club post! This one was ridiculously last minute because of exams, rehearsals and a trip to Sydney for a three day workshop (and then post-workshop coma), but its here! This month I was assigned to Lavender and Lime, run by the lovely Tandy, and I had a really great time sifting through all of the posts, but I kept coming back to this custard. Which was odd considering I don't normally go for sweet things, but it seemed so delicious.

I am not the kind of girl to own ramekins, so I did batches in a smaller ovenproof dish I already own, and it still worked out perfectly! The only problem was that I found it super difficult to photograph well, so I strongly recommend you head to Tandy's blog and check out her amazing photograph! I'm sure the photo was 90% of my motivation to make this. I grated some chocolate on the top but in this weather chocolate doesn't really grate, it melts between your fingers and the grater. It still tastes great though!


BAKED CHOCOLATE CUSTARD
Serves 6
Total time commitment: 45 minutes (25 minutes baking)
Recipe from Lavender and Lime

100g dark chocolate
515ml milk
100g sugar
6 eggs

1. Preheat oven to 180C. Over a double boiler, melt the chocolate with 15ml milk. When smooth, add to a saucepan with 500ml milk and bring to the boil. Remove from the heat for a bit.

2. Whisk eggs and sugar together until pale and thick. Gradually add milk, continuing to whisk.

3. Place 6 large ramekins into a bain marie (see this post for help) and bake for 25 minutes.

Check out the other fabulous posts here :)


Wednesday, November 30, 2011

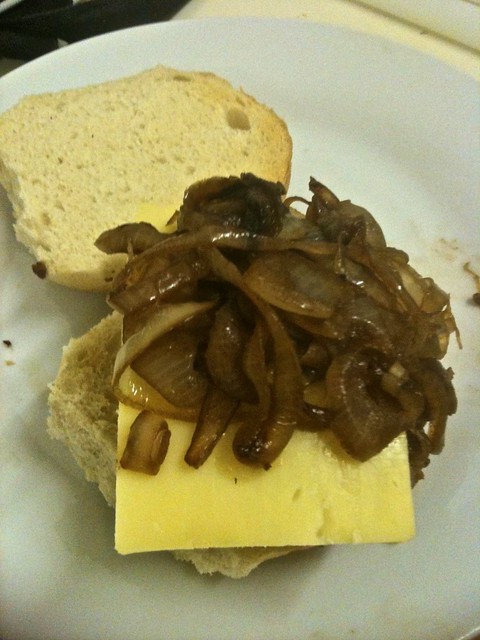
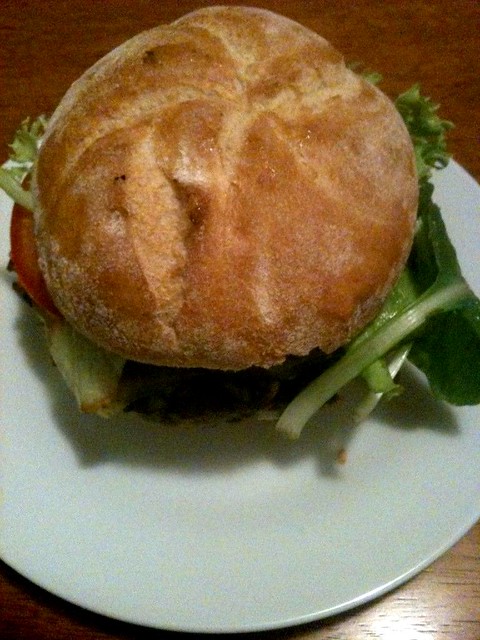
Salt Crusted Burgers and Caramelised Onions

Oh my goodness, guys. I think I totally beat the cheeseburger recipe in terms of Most Delicious Burgers Ever. Also, these were much simpler, which makes it even BETTER. I've been following the blog Stonesoup for a while now, since I decided to learn to make sourdough and found a recipe on Jules' site (for the record, it was incredible, I just never got a good enough photo to post the recipe; if you are interested you can find it here. Also I understand that I have only been posting phone pictures lately which makes that reasoning invalid). The recipes are delightfully simple, and most contain less than 5 ingredients which is so great. The bonus with these burgers is that most of the ingredients I would generally have on hand anyway! Except bread. I've only just started keeping a loaf of bread in the freezer, I don't eat enough to warrant always having a fresh loaf in the house, let alone rolls! (Honestly, though, I live within walking distance of at least three shops so its no big deal to run out and get some, which means this recipe is a-ok with me)

The burgers are really juicy without cooking them in oil, because the salt layer helps the juices to congeal and form a 'crust' on the burger. Is this common knowledge? It should be. I am so impressed with these burgers, you don't even know.

Just a disclaimer on the "quick" tag - the burgers are incredibly quick, the onions not so much - although I came home from work on Tuesday night and had made burgers and 2 onions' worth of caramelised onions in half an hour, so maybe I have unreasonable standards of what quick means. I've split the recipe into the two sections - burgers and onions - in case you're only making one part. Apparently the onions can be kept for about a month in the fridge, but I haven't tried storing them yet.


SALT-CRUSTED BURGERS
Serves 4 in a burger bun - if you're serving them without bread I would add a little extra meat per person, the original recipe called for 400g to serve two people
Total time commitment: 10 minutes
Recipe from Stonesoup

400g minced beef
salt

1. Heat a frypan on really high heat for three minutes. Shape the beef into the desired number of patties.

2. Sprinkle a fine layer of salt over the frypan and place the burgers on top. Cook for 4 minutes then flip, sprinkling more salt on the pan. Cook until they are done to your liking.


CARAMELISED ONION
Makes a lot
Total time commitment: Depends on how much onion you have, but this took me 20-25 minutes and I only waited until a few of the onions had browned.
Recipe from Stonesoup

2 onions, thinly sliced
Balsamic vinegar

1. Heat olive oil in a large pan. Add onions and cook, covered, until the onions are dark brown, stirring every 5 minutes or so. As I mentioned in the time commitment spot, I didn't brown all of the onions because I am both hungry and impatient.

2. Add a few splashes of balsamic vinegar and cook, uncovered, until the onion is soft. I added vinegar until it looked about the right colour, so do whatever works for you.

Wednesday, November 16, 2011

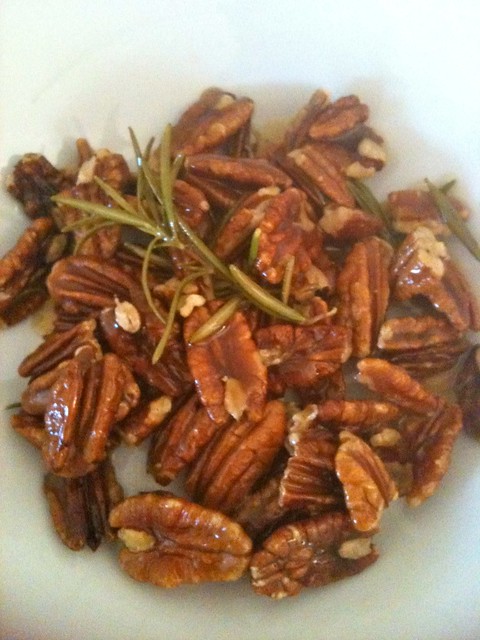
Rosemary and Honey Pecans

I found (and made) this recipe through a delightfully serendipitous turn of events. I was cruising Facebook instead of studying and Papermash linked to Sweet Paul magazine, which I had never heard of. I moseyed on over to have a look and this recipe came up. I had leftover pecans from the salted caramel pecans and was at Levi's house, which meant I had access to fresh rosemary to make it. Also, I was really bored of studying. In my defence, I did have an exam this morning so my brain wasn't functioning very well anyway.

I used a very scant cup of pecans, and ended up with a lot of honey/butter mixture sitting in the bottom of the dish. Don't get me wrong, it was delicious and I ended up drizzling it over the top, but I suspect if I used a full cup of pecans they would get crispier from not sitting in a puddle of delicious. Just a hunch, though, because the salted caramel pecans weren't necessarily crispy.

And did I mention how dishes-friendly this is? The original recipe said to melt the butter in a saucepan and then put it in a bowl with the other ingredients but bro, I have a microwave, I might as well just use one bowl. Next time I'm going to skip the bowl entirely and make it in the ovenproof dish from the get-go. One dish recipes are the GREATEST.


ROSEMARY AND HONEY PECANS
Serves 4, maybe? Are you serving them with cheese? I think thats a good idea. I should have done that.
Total time commitment: 15-20 minutes
Recipe adapted from Kate LeSueur in Sweet Paul magazine

30g butter
1/2 tsp salt
1/4 tsp ground pepper
1 cup pecans
2 stems rosemary
2 tbsp honey

1. Preheat oven to 165C. Melt butter in a bowl, add the rest of the ingredients, and mix to coat pecans.
2. Put in an ovenproof dish and cook until toasty. 

Monday, November 14, 2011

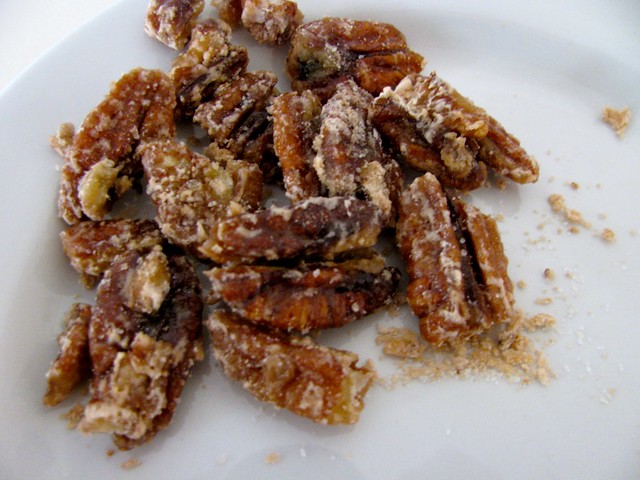
Salted Caramel Pecans (Secret Recipe Club)

It's SRC time again! This month I was assigned to Desi's blog, Steak N Potatoes Kinda Gurl, which I could tell from the title was going to be my kind of blog. Everything looks incredibly delicious, but with Christmas coming up and my intense love of all things salted caramel, I decided to give these salted caramel pecans a try. Levi and I ate these sprinkled over macadamia and honey ice cream and it was essentially the best thing I've ever eaten in the whole world.

Because Desi used pecans in a Christmas recipe (for the 12 Weeks of Christmas Cookies and Sweets), I assume its not just my family who associates pecans with Christmas. When we used to go camping mid-year, Mum would make really boss pecan pies (which I didn't appreciate at the time), and now she makes mini versions to give people for Christmas (which I do appreciate, and try to eat as many as possible). So there's how my mind worked. Good-o.

Salted caramel sounds fancy but this was ridiculously easy, there's just a lot of waiting and watching time. By a lot, I mean about 10 minutes, so not exceptionally long. Comparatively long to how much effort this recipe takes, you can throw the whole thing together in 15-20 minutes, which is just how I like recipes!

I left the cinnamon out of these because I didn't want it to potentially tarnish my salted caramel experience (and pecans are expensive, so I didn't want to risk being sad and having to make more un-cinnamon ones... although I have some leftovers so I might try them with cinnamon later). If you want to add it, though, the original recipe calls for 1/4 tsp ground cinnamon to be added with the salt. I also didn't measure out the salt, I just added it until it tasted good, but I've included the original measurement in the recipe as a guide.

As always, if you want to keep up to date or have a go yourself, the Secret Recipe Club website is here and it is delightful.


SALTED CARAMEL PECANS
Serves 2 - 4, it depends on how hungry you are!
Total time commitment: 15 - 20 minutes
Adapted from SteakNPotatoesKindaGurl

1 cup unsalted raw pecans
1/2 cup granulated sugar
3 tbsp water
1/2 tsp sea salt

Combine water, pecans and sugar in a saucepan over a medium-high heat. When the sugar begins to liquify, start stirring, and keep stirring until the sugar begins to crystallise.

Bring the heat down to medium-low and continue stirring. When the sugar is getting to the level of brownness that you would like, start coating the pecans with it (I used a wooden spoon). When the pecans are coated, sprinkle salt (and cinnamon, if you're using it) over them and leave to cool on a baking sheet.

Have a look at what everyone else has done here:


Monday, October 31, 2011

Spiced (The Kitchen Reader)

It's time for another Kitchen Reader book! This month's was Spiced: A Pastry Chef's True Stories of Trials By Fire, After-Hours Exploits, and What Really Goes On in the Kitchen by Dalia Jurgensen, chosen by Libbi of Domestic Wandering.


I wasn't expecting to like this book, because for some reason I thought a memoir would be boring. And yes, some bits I wasn't too interested in the outcome of (relationship stuff? Surprisingly not my thing), but generally it was great. It actually made me want to become a pastry chef, until the rational part of my brain piped in with "No Emily, we've already done that and it wasn't as fun as you expected". Which brings me to the point that I don't think I've ever mentioned on my blog that I started a traineeship with an Italian pastry chef. But I digress!

The whole leaving-my-desk-job-to-pursue-my-dream thing is a bit hackneyed, but I wasn't quite as irritated by it in this book because it's actually real life, not a terrible film storyline. It also seems like nobody ever learns anything in culinary school that is of real value to working in a professional kitchen. Regardless, I really enjoyed the book, and got through it exceptionally quickly, which probably means I was more sucked in to the story than I anticipated. I would recommend this to anyone who is curious about what its like working in a kitchen. In my experience, the chauvinism and dysfunction are a bit hyperbolic in the book, but its definitely a good read.

THREE OUT OF FIVE WHISKS.

Monday, October 17, 2011

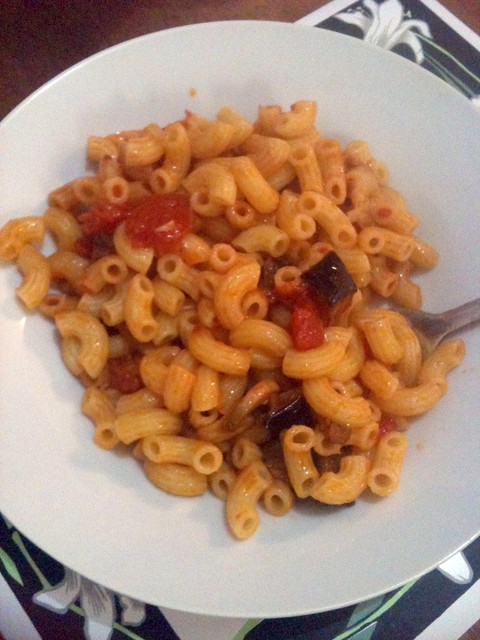
Roasted Eggplant and Tomato Pasta (Secret Recipe Club)

SRC time again, already! Having something to do every month really makes me realise how little I post on my blog. This month I was assigned to Ethan's blog, Food in My Hands. I spent the better part of the month trying to decide what to make, everything looks so good. First it was Maple Swirl Bread, then White Chocolate and Cranberry Cookies, then Veggie Meatballs with Roasted Red Pepper Sauce... in the end, though, I settled on roast eggplant and tomato pasta. Because I love me some pasta, and I was keen to try roast eggplant. I made this for dinner at the Friendzone, so instead of adding sausages (because Levi is a vegetarian and veggie sausages are expensive!) I substituted them for mushrooms, and I think it worked out delightfully. I also substituted fresh tomato for tinned diced tomato, thats just because I am lazy. Also tomatoes are expensive at the moment, who knew?

As always, the Secret Recipe Club website is looking delightful and you should head over there.


ROASTED EGGPLANT AND TOMATO PASTA
Serves 4
Time commitment: 40 minutes roasting, 20 minutes actual work
Recipe from Food In My Hands
Cost: $1.82 per serve. 


500g pasta (I used elbow pasta, but I'm sure anything would work)
1 large eggplant
6 mushrooms
400g can diced tomato
Olive oil

1. Preheat oven to 180C. Cube the eggplant and put it in a roasting dish with a generous amount of olive oil. Cook for about 40 minutes or until roasted, flipping halfway to make sure its all even. Well, as even as it will get. Fun fact: Smaller cubes that have lots of olive oil go really crispy and are fun to eat straight out of the oven.

2. Slice mushrooms and fry in a little olive oil until browned. Turn heat to medium-low, add diced tomatoes, and heat. Add eggplant and let the sauce thicken.

3. At this point, you can cook the pasta and serve it, or refrigerate the sauce for later. I haven't tried freezing it yet, I'm not sure about how it would go with the texture of the eggplant, but I made mine before uni and threw it in the fridge until dinner and it turned out fine!


Saturday, October 8, 2011

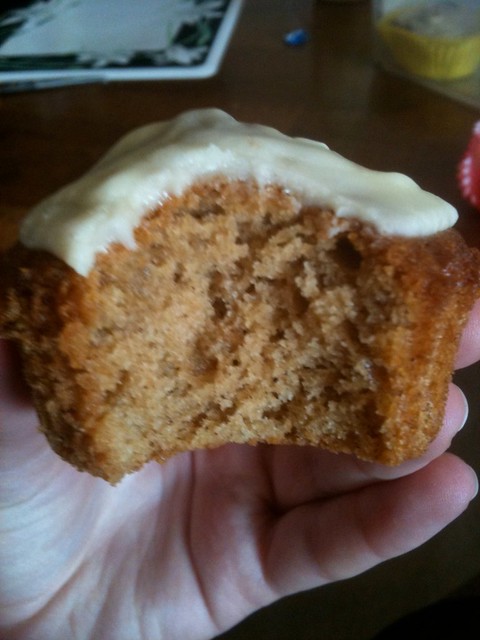
Gingerbread Cuffins with Cream Cheese Icing

Do you ever get to that stage where you know you've had a recipe bookmarked for ages, but its not until you finally get around to making it that you see how embarrassingly long it has been there for? I realised when I finally got around to purchasing all of the ingredients yesterday that Sian published this recipe in December 2009. Gracious me. I had been planning to make these yesterday, but then my friend who I haven't seen in almost a year (disgraceful!) came over with cupcakes and we had a grand old time which meant I needed to devote the rest of my afternoon to uni work. So instead when I woke up at 8 this morning after having a terrible sleep, I made these for breakfast. Also I can highly recommend the uncooked mixture as one of the more delicious things I have eaten.

Sorry, family members who think I am responsible. It gave me the boost I need to write more of my essay! That counts as responsibility!


I'm still not sure whether to call them cupcakes or muffins... I feel like cupcakes are terribly dainty and adorable and celebratory, and the spices in these make me want to call them muffins. I think the fact that it is cream cheese icing, which must be healthy because its used on carrot cake and that is a cake with CARROTS in it so +50 health points, has swayed me to the "muffin" side. Even though I know what is in cream cheese icing now and its essentially butter icing with cream cheese. Cupcake muffins. Cuffins.


GINGERBREAD CUFFINS WITH CREAM CHEESE ICING
Makes 10 large, muffin-sized serves
Total time commitment: About 40 minutes, including 20 minutes cooking time
Recipe from Monster Girl Writes

1/2 cup SR flour
1/2 cup plain flour
1/4 tsp bicarb soda
2 tsp ground ginger
1 tsp ground cinnamon
1/4 tsp ground nutmeg
1/2 cup brown sugar
1 egg
100g butter, softened
1/4 cup milk
2 tbsp golden syrup

Preheat oven to 170C. Combine dry ingredients, then add wet ingredients and mix together. Spoon into cupcake liners and bake until springy and golden.

While cooking, combine the following:
30g butter
50g cream cheese
2/3 cup icing sugar

When the cupcakes are done, take them out of the oven and let them cool for 5 minutes before icing them. Lovely!


Friday, September 30, 2011

The Kitchen Reader: Home Cooking

So on top of my SRC commitments that mean I'm posting at least once a month during my hectic uni times, I've also joined The Kitchen Reader, where members read one food-related book per month and blog about it. This month's book was Home Cooking: A Writer in the Kitchen by Laurie Colwin, chosen by Sarah from Simply Cooked (whose blog is also fantastic!)


I wasn't expecting much from this book, because I'd prefer to be reading recipes (or, you know, eating) than just reading about food. I was very wrong! The book is amazing, and I've already sent it down to Mum to read because I am going to get crazy evangelical about everyone in my extended family reading the book. It's so good. There are recipes interspersed into the short essays, and it wasn't pretentious at all. I don't think its possible to be pretentious when you are writing about eggplant for one. I just enjoyed everything about this book, so you should probably pick up a copy ASAP.

Monday, September 19, 2011

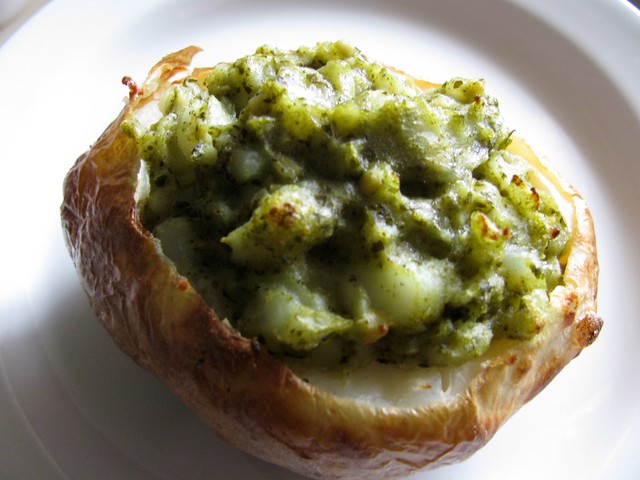
Secret Recipe Club: Pesto Potatoes

I know, how predictable that I chose another potato recipe :P I've been so swamped with uni and the panto rehearsals/performances that I haven't had time to cook anything of note lately. It was a welcome challenge to fit the SRC into this month! (Also, please do click the link and visit our webpage, it looks pretty rad).

The blog I was assigned was Savouring the Thyme. Jennifer's blog is great! I bookmarked so many things to make this month but it turned out that this was the only thing I could fit into my uni work haze. As soon as I hit summer holidays, the bookmarks are coming out!

These potatoes are ridiculously simple and I can't believe I never thought of combining potatoes and pesto before. If you can commit to the hour for roasting the potatoes, and I suggest you do, this is entirely worth it.

PESTO POTATOES


Serves 1
Total time commitment: 1 hour 20 minutes (1 hour 15 minutes cooking, 5 minutes actually working)
Recipe from Savouring the Thyme


1 potato
1 tsp pesto

1. Coat the potato with olive oil and roast for 50-60 minutes until tender. Leave to cool until you can handle them.

2. Cut off the top third of the potato and set aside (or eat - I ate and it was one of the best decisions I've made). Scoop out the innards of the potato, leaving a little wall around the skin so it doesn't collapse in on itself.

3. Mash the potato insides and pesto together and scoop back into the potato.

4. Bake for another 15 minutes.

Click here to look at all of the other members' recipes!


Friday, September 2, 2011

Friend Zone Food: Cheeseburgers

I'm so sorry about the lack of posting! I've been absolutely swamped with uni work and panto and work, and to be completely honest I've been living on things like baked beans, jacket potatoes, and microwaveable Indian meals. Its the same story as last month though, I've been eating a lot of meals at the "Friend Zone", the nickname we've given the house that Levi and Chris and Briony moved into down the road, so I thought I should add another category for meals I have at their place that someone else has cooked with me (or cooked entirely :P).

Chris and I made these burgers last night when Levi and Briony were still away on a uni trip. If Levi is away it seems remiss to not take advantage of the opportunity to cook something that isn't vegetarian! And when I say Chris and I made them, I mean Chris made them and I picked up hamburger buns on my way there from work. The burgers are from the cookbook What to Cook and How to Cook It by Jane Hornby, which I would absolutely recommend. There are step-by-step photos, and all of the ingredients are set out in a delightfully organised photo at the beginning of each recipe. This is the third or fourth dish we've eaten from that cookbook and everything has been simple to make and really delicious.

These burgers were SO GOOD. I'm going to make them again soon, because they were really great. Before we started I was lamenting that we didn't have any chips with them (because I obviously have attachment issues with not having potato in my meals) but it was so filling that I wouldn't have been able to fit them in anyway!

Also happy birthday shout outs to Tara, who turned 22 on Wednesday, and my cousin Clare whose birthday is today :D


Serves 2
Total time commitment: 30 minutes
Recipe adapted from What to Cook and How to Cook It

1/2 onion
3 small gherkins
250g minced beef
1/2 tsp Dijon mustard
1 egg
Salt and pepper, to season
2 large burger buns
4 slices cheese, to cover patties
Lettuce and tomato, to serve

1. Preheat the grill to high. While its preheating, finely chop the onion and gherkins and place in a large mixing bowl. Add the egg, mustard, mince and salt and pepper, and mix together.

2. Roughly divide the meat in half and shape into two burgers, about 2cm thick. Our burgers were HUGE but delicious, and they looked silly in the tiny buns, so I would recommend this for the comedic value.

3. Place the burgers onto the grill and cook for ten minutes, flipping halfway through. If they need a little longer, then do that. Whatever floats your burger-loving boat!

4. While the burgers are cooking, slice the tomato and wash the lettuce so you can go for your life when the burgers are ready. Halve the buns as well.

6. Burgers are looking good? Excellent. Put some cheese on top of them, and place the halved buns face up (the face being the cut side) on the grill. Whack everything back in there for another minute or so, just to melt the cheese and brown the buns.

7. Assemble the buns and serve.

Monday, August 22, 2011

Secret Recipe Club: Oven Stuffed Potatoes

So I mentioned that I had been on a microwaved potatoes kick just before uni started. My laziness aside, I just really like potatoes because they're easy, so I was pretty overjoyed when I found this recipe for stuffed potatoes on my SRC assignment this month! I was assigned to Gloria's blog, Canela Kitchen, and I fell in love with most of the recipes she has posted.

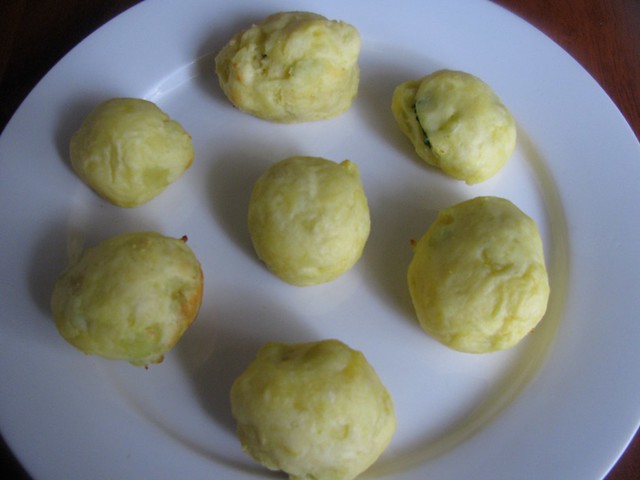
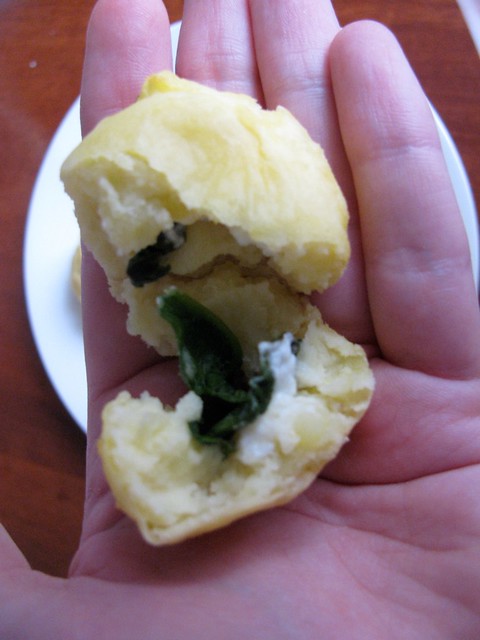
I adapted this recipe to make it vegetarian, and omitted the parmesan cheese coating (although will definitely make them again with the parmesan!). I really loved the end product, and making them almost bite-sized meant I could just pop them in my mouth while marathoning Mad Men. (I know, I'm four years behind everyone else, but goodness it is a good show)


OVEN STUFFED POTATOES
Serves 6
Recipe from Canela Kitchen

1 kilo potatoes, peeled
3 egg yolks
3 tbsp flour
Spinach and feta, to fill

1. Boil and mash the potatoes. Add the egg yolks and flour, and mix to form a dough. Preheat oven to 190C.

2. Wilt the spinach by rinsing it under cold water and then place it into a medium-hot frying pan with only the water that is still on the leaves for a couple of minutes.

3. Cut the feta into small cubes.

4. Form the potato dough into evenly-sized balls. Now that you have checked they're all even, squish down each ball and place a spinach leaf then a cube of feta (or more, depending on size) in each and re-shape into balls.

5. Place the balls on a baking tray and cook until browned (this will vary depending on size).

Check out the other members' recipes here!

Thursday, August 4, 2011

Lentil and Tomato Soup

Last week, I didn't do a meal plan. It was the last week of holidays and psssh, people have been surviving and not making meal plans for years, right? It turns out I am not one of those people that can survive without a meal plan. I think the disaster wasn't helped by shopping day moving from Monday to Thursday, so I had ten days between grocery shops, but I did end up eating essentially nothing but microwaved potatoes for two days.

I swear to goodness, if I didn't have friends living down the road to cook for me and let me eat their biscuits, I probably would have faded away to nothing.

So on Monday, once I had run out of potatoes, I decided to finally cook this soup. I got the recipe from one of the free Coles magazines, and actually had everything on hand to make it (its okay, I also wonder why I didn't make it earlier in the week). I have a five hour break on Mondays which gives me more than enough time to come home for lunch and whip something up. Also, I'd only eaten an apple before I went to uni and apparently they do not fill you up for four hours. Who knew? :P

I added some carrot to the soup to bulk it out a bit, and next time I think I will also add some green vegetables (peas and broccoli and the like) for colour and deliciousness. In the various incarnations of this soup (it makes four to six servings), I've had it with spinach, pine nuts, and bacon, and I'm sure there are a million other toppings you could try.


LENTIL AND TOMATO SOUP
Serves four to six
Total time commitment: 30 minutes
Recipe adapted from Coles Magazine
Cost: 68c per serve (if recipe makes 4 serves)


1 tbsp olive oil
1 onion, chopped
1 tsp ground cumin
1 tsp ground coriander
1 cup red lentils
1 carrot, diced
400 g diced tomatoes
3 cups vegetable stock

1. Heat oil in a large saucepan. Add onion and cook until soft. Stir in cumin and coriander and cook, stirring, for one minute.

2. Add lentils, carrot, tomatoes and stock. Bring to the boil, reduce heat, and simmer until lentils and carrot are soft (about 10 - 15 minutes).

Sunday, July 31, 2011

Chocolate Delice with Salted Caramel

Does anyone remember when I said I liked things that you could throw together relatively simply? Did the "easy" and "quick" tags give it away? Well. Gracious me. Nicola and I spent five and a half hours making these. I would say I don't understand how they managed to do this on Masterchef in 90 minutes (or whatever absurd time they were given) but I do:
1. Blast chillers,
2. Making 2 large ones in 2 large moulds, not 18 small ones in batches of 3 because you only have 3 moulds, and
3. Blast chillers.

Picture from Nicola's shiny new iPad, what what

I think last time I cooked something with Nicola it was the Epic Cake which we SkypeBaked while she was in Italy, which took us three hours, so we've definitely reached new highs (lows?) with this.

The only criticism I've had so far (from Chris/Gordo, obviously. I can't refer to him as Gordo since he shaved his head. It was six months ago but I'm still harbouring a grudge), which I agreed with, was that the biscuit base was too hard. Also, our "creme brulee" layer just tasted like baked custard, but I like custard so it wasn't a big deal.

If you have a free day, or a lot of cake rings, I would recommend making this. Get the recipe here!

Pineapple Upside-Down Cake

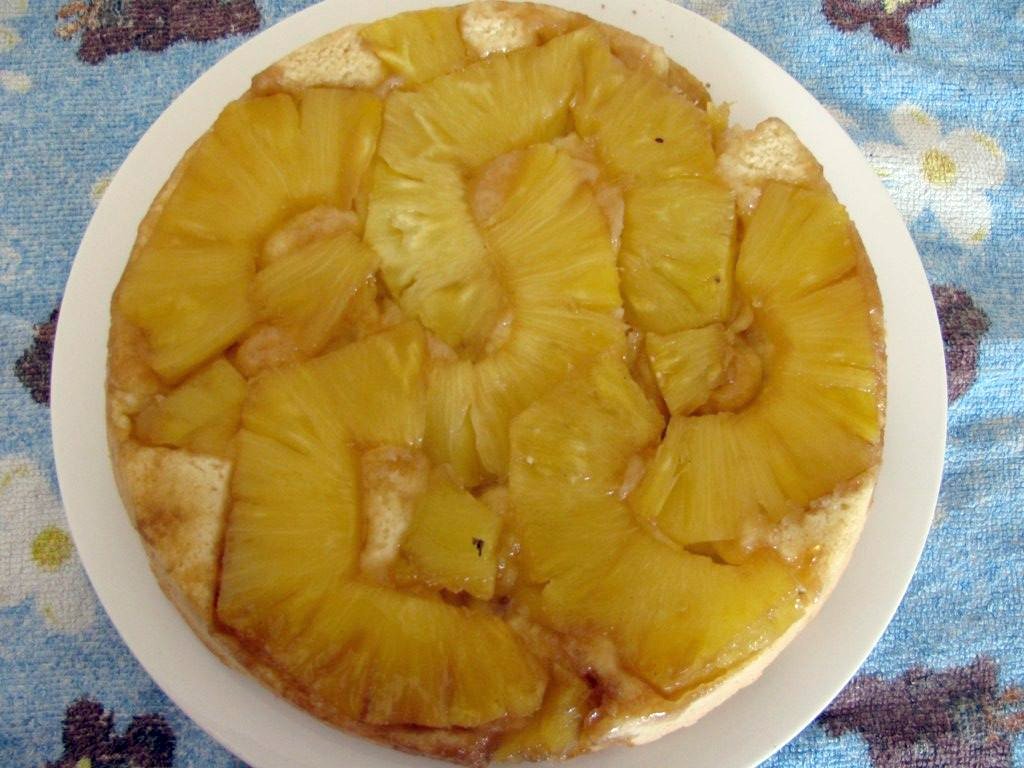
So pineapples were $2 each a few weeks ago, and in my "Grocery shopping is FUN!" haze (that's not even sarcastic, I really do enjoy it. I recommend having a grocery shopping date as your weekly get-together with a friend, I don't think I'd be able to function without it) I bought one with some vague hopes of making a juice in my smoothie maker.

About a week later, Meryl came over and asked why I had a pineapple ("I dunno") and what I was going to do with it ("I dunno"), then decided we would make a pineapple upside down cake, and that was that. Meryl is my friend's girlfriend who lives in America but came over for visiting and we got to spend a crazy amount of time on my couch watching trashy TV while her boyfriend was at work. It was as awesome as it sounds, trust me.

Apparently this is more dense than they normally are, but I didn't have any complaints! Anything that can be thrown together reasonably simply with ingredients I already have is fine by me.

Non-inverted Second Cake and inverted First Cake (we doubled the recipe to use up all of the pineapple)


PINEAPPLE UPSIDE-DOWN CAKE
Serves 8
Total time commitment: 40 minutes - 1 hour, most of which is baking
Recipe from Taste.com.au


1/2 a pineapple, cut into rings; or 440g can pineapple rings
1/3 cup brown sugar
90g butter, softened
1/2 cup caster sugar
2 eggs, lightly beaten
1 1/4 cups self-raising flour

1. Preheat oven to 180C. Grease a round cake pan with butter and sprinkle brown sugar over the base of the pan.

2. Arrange pineapple over the brown sugar. If you need to cut the rings in half to get them to fit, please do, it is better to have halved pineapple on your slice than no pineapple! You could even halve all of the pieces if you are concerned about the aesthetic value.

3. In a mixing bowl, cream butter and sugar with an electric mixer. Add eggs, one at a time, and mix until combined. Add flour and stir to combine.

4. Spread cake mixture over the pineapple and bake 30 - 40 minutes, or until a skewer/chopstick/knife/other implement you have on hand inserted into the centre comes out clean. Cool, invert onto a plate, and serve.


Tuesday, July 26, 2011

Monday

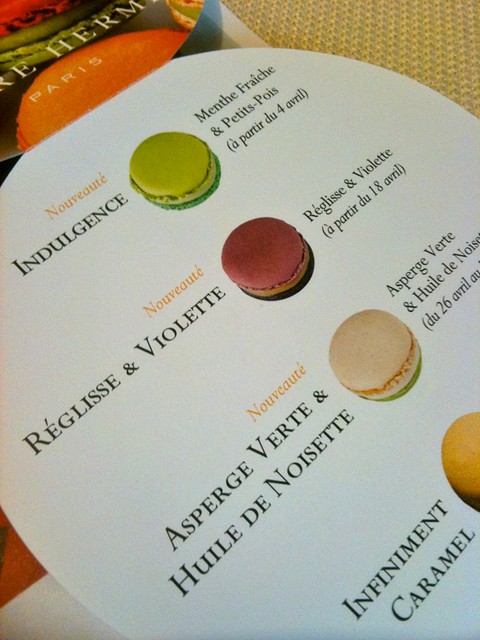
Grandma is back from France! Hoorah! (my excitement is not just because of the macarons)


And then I went to see Elbow with my best friend and it was the best day ever. This is during 'Starlings', if you are interested. In the BWAAAAAAMP. I apologise for the awful phone-quality.


Sunday, July 24, 2011

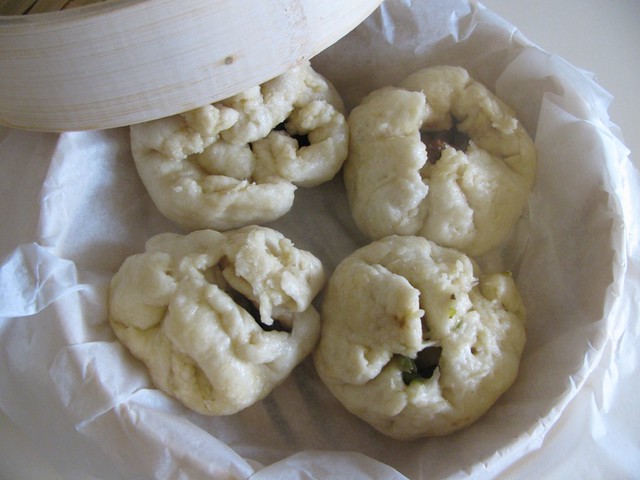
Steamed Pork Buns

I really have not been posting as much as I expected to over the uni break. During exams I was thinking about all the nice things I would cook with all of my free time and that lark, but I ended up being rather busy with seeing friends and hanging out with my friend's girlfriend who was visiting from America (and left yesterday D:) and playing Tetris. I also discovered Parks and Recreation, so that ate up a lot of my time.

Something else that ate up a lot of my time was these steamed pork buns! I've been craving them for about six months, since I left Sydney last (at the end of January) and had them at the airport. I saw a steamer in the supermarket, thought that it would be a great idea to make them, and promptly bought it.

Of course, since I took almost an entire day to make them, I've found them at food courts everywhere over here. Don't get me wrong, these were delicious, but not really worth the effort. Making my own bread? Fine. Roasting entire pumpkins, then using the skin for stock and roasting the seeds for snacks? Great. Taking a whole day to make four steamed pork buns (and four steamed char-siu vegetable buns for Levi)? Not so much fun. These are definitely being relegated to "buy".

The saving grace of these, though, is that the roast pork with char-siu sauce was AMAZING, and I will make it again. Without the dough-making and bun-forming and steaming, the pork seems worth making at home. Also I have some leftover pork which needs to be used up. Just saying.

I only made a couple of substitutions/omissions from the recipe - no shallot in the marinade, oyster sauce for soy sauce, and rice wine for gin. I can't think of anything else you could use as a steamer, but the steamer wasn't expensive (about $12 I think).


STEAMED PORK BUNS
Makes 8 buns
Total time commitment: 2 - 3 hours
Recipe from Taste.com.au
Cost: $2.47 per bun, assuming they're all pork buns and not vegetable


For the buns:
2 cups Plain Flour
2 ½ tsp Baking Powder
2 Tbsp Caster Sugar
1 tsp Salt
½ cup Warm Water
2 Tbsp Vegetable Oil

For The Char-Siu Pork:
3 Tbsp Char Siu Sauce
½ tsp Five Spice Powder
1 ½ tsp Oil
250 g Pork Fillets, trimmed
1 ½ tsp Honey

For The Sauce:
4 Tbsp Reduced-Salt Soy Sauce
2 Tbsp Shao Hsing Rice Wine (I substituted gin)
2 tsp Cornflour
1 tsp Sesame Oil
½ cup minus 2 Tbsp Caster Sugar

1. Preheat oven to 200C. Combine char-siu sauce, oil and five-spice powder from the pork section, and marinate pork in the mixture for 30 minutes - 2 hours.

2. While the pork is marinating, combine dry ingredients from the bun section, then gradually add water and oil to form a soft dough. Turn onto a lightly floured surface and knead until smooth. Wrap in cling wrap and refrigerate for one hour while you cook the pork.

3. Remove pork from marinade, place in a baking dish, and cook for 40 minutes, basting occasionally (I did every ten minutes) and turning the pork over halfway through. When cooked, remove from oven, brush with honey, and wrap in alfoil for five minutes before slicing.

4. While the pork is cooking, combine sauce ingredients (minus the oil) in a jug and whisk to combine. When the pork has been sliced, heat oil in a frypan and add pork and sauce. Cook, stirring constantly, until mixture comes to the boil. Set aside to cool.

5. While pork is cooling, remove dough from refrigerator and divide into 8 portions. Roll each portion into a round of dough. Place a spoonful of pork into the centre of each round and pinch the tops together (as you can see, I didn't do such a good job of this).

6. Pour water into a wok, saucepan or frying pan to about 1/3 full - whatever your steamer will fit on top of so that it doesn't touch the water. Bring water to the boil over a high heat. Line your bamboo steamer with baking paper and add buns (I could fit four at a time). Cover with steamer lid and cook for 10 - 15 minutes, or until a skewer inserted into the bun comes out clean. Repeat to cook remaining buns and serve.

Monday, July 18, 2011

Secret Recipe Club: Sweet Applets

Its time for another Secret Recipe Club recipe! After the success of last month's white chocolate cheesecakes, I was planning to do something savoury, but I was sold on these Sweet Applets from Megan's Cookin'. There are so many recipes that look delicious on Megan's blog! This one is from the Pillsbury's 100 New Bake-Off Recipes cookbook (which sounds so delightfully twee). The only thing I didn't do was dip the cooked applets in melted butter, sugar and cinnamon, because they were breakfast and I thought that was a little too decadent. The recipe didn't give any measurements for these so if you want to do that, go right ahead and top to your hearts content!

Also, please note that I remembered to buy paper cases this month :D


SWEET APPLETS
Makes 12 large muffin-y type things
Total time commitment: 35 minutes
Recipe from Megan's Cookin'
Cost: $4.36 per batch - $0.36 per applet


1 1/2 cups self-raising flour
1/2 tsp nutmeg
1/2 cup sugar
1/3 cup butter
1 egg
1/3 cup milk
1 1/2 cups apple (I used two Granny Smith apples), cubed

1. Preheat oven to 200C. Combine flour and nutmeg and set aside.

2. Cream butter and sugar. Add egg, combine, and alternately add milk and flour mixture. When combined, stir in apple.

3. Spoon into muffin tray and bake for 20 - 25 minutes until golden.

Check out other members' contributions here:


Thursday, July 14, 2011

Sunday night side-dishes

On Sunday, I really couldn't be bothered to cook, and occasionally I leave Sundays off my meal planner because I lose steam when I'm planning or assume I'll have leftovers. This week was one of those weeks, and there was really nothing in the house except the better part of a 3kg bag of potatoes and some assorted vegetables. This started out as an attempt to make a variation on jacket potatoes that Mum used to cook us, where you scoop out the inside of the potato but leave a kind of potato-bowl-perimeter, mash it with some vegetables and cheese, and put it back into the potato. It didn't work out that way, so it ended up being a combination mashed potato. The honey carrots were there as a request from Levi, who had them at a friend's place last week and is obsessed with them now. Let's be honest, though, they're a favourite of mine as well. I haven't included the recipe because I'm still perfecting it!

The beauty of this mashed potato is that aside from the standard one-potato-per-person, the quantities and varieties of vegetable or cheese are entirely up to you and what's left in the pantry.


COMBINATION MASHED POTATO
Serves 2
Total time commitment: Varies depending on potato size, but roughly 30 minutes
Recipe adapted from Mama's jacket potatoes

2 medium-to-large potatoes
Frozen peas and beans
1 carrot, diced
A couple of florets of broccoli, chopped
Butter
Cheese
Tomato, diced

1. Steam the potatoes and vegetables (excluding tomato) in whatever way you prefer - microwave or stove top. If you have an hour spare, you can roast the potatoes, but for this I don't bother. Grate some cheese while you wait.

2. When they are done, cut the potatoes into small cubes (don't burn yourself, please) and put into a bowl with some butter. Mash until they are suitably mashed to your taste. Add the steamed vegetables, diced tomatoes, and grated cheese, and combine. The cheese should melt into the potato and be all delicious. Best eaten while sitting on the couch watching some trashy television.