Welcome back, Blogger! If you aren't someone who uses Blogger you probably didn't know that it has been out of action for a few days. If you are, you probably also considered jumping ship and moving to WordPress (but I haven't, because I like it here).
So now you can finally get my recipe for sweet potato curry. Trust me, it is a ripper. It takes a little longer than I would usually spend on a dinner, but its quite worth it. I made this on one of those days where nothing goes quite right and you don’t have all the ingredients. News flash: after a year of diligently keeping my cupboards stocked with 400g tins of diced tomatoes, I didn’t have one when I went to cook this; I forgot to add cauliflower to my shopping list; I couldn’t find ground coriander so smashed up some coriander seeds and then when I was looking for cumin, found the ground coriander so added that too; cashews were too expensive so I didn’t top it with cashews - and hopefully Levi doesn’t read this because I neglected to tell him they were in the recipe in case the dish tasted worse in comparison to how good it could have been with the cashews.
If you want to follow the normal recipe, sub the tomato paste and water for 400g tin tomatoes. And if I can make a suggestion - cube the sweet potato quite small, because it will cook faster and you won’t be standing over the pan dying of hunger. I’ve added a lot of options into this recipe, because depending on what you have available, things can be added at a myriad of times. I’ve also not given any measurements for garlic or ginger - go with what you like. I substituted the cauliflower for frozen peas, because they added a bit of colour as well. This is quite a nice, easy dish served on rice, and the leftovers were good for lunch the next day. I’m a little concerned at how much I eat if the recipe is meant to serve 6 and I got 3-4 servings out of it, but it was SO GOOD.
SWEET POTATO CURRY
Serves 4
Total time commitment: 1 hour
From Leon: Naturally Fast Food Book 2
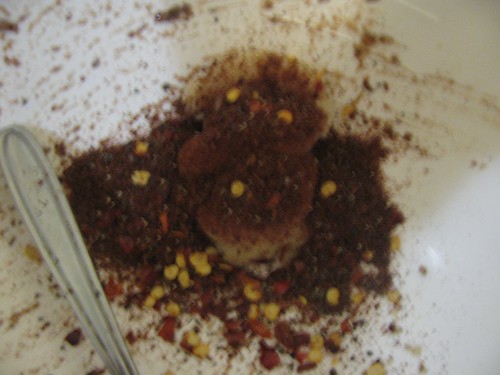
1 onion
Oil
Ginger
Garlic
2 tsp ground coriander
2 tsp ground cumin
1/2-1 tsp cayenne pepper
1 tsp turmeric
1 sachet tomato paste
200ml warm water
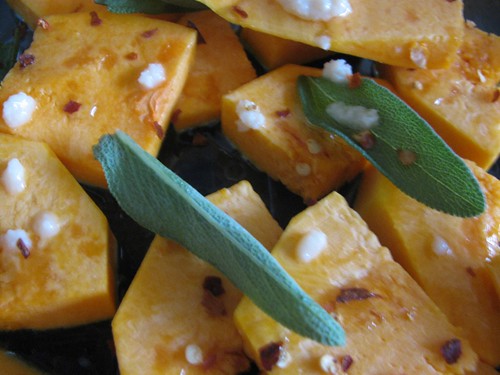
4 baby sweet potatoes, peeled and cubed
400g tin coconut milk
Frozen peas
1. Chop the onion and fry in oil for 5 minutes. If you are using minced garlic from a jar (hello, self), add it with the oil; if you’re using *proper* garlic, then add it after the onion has softened a bit. If you’re using *proper* ginger, add that with the garlic; if you are using ground ginger, add that, along with the other spices, about a minute after the *proper* garlic/once the onion has softened.
2. Add the sachet of tomato paste and the warm water/tin of diced tomatoes, and the sweet potato. Cook for 30 minutes, adding water if it seems to be drying out.
3. Add frozen peas (as many as you like) and coconut milk to the pan, put the lid on and simmer for 10 minutes (or until soft). Delicious.
Showing posts with label main. Show all posts
Sunday, May 15, 2011
Monday, April 18, 2011
Lasagne
This lasagne recipe has to be one of the easiest things ever.
And oh man, has this lasagne has got me through a tough week.
Like that time I didn't sleep enough and cried because I'd already eaten two servings and I still wanted more. Seriously, this is why I advocate going to bed early. But also why I advocate this lasagne, it is clearly delicious. I mean just look at all that cheese.
LASAGNE
Serves 6-8, you don't want to cry because you didn't eat enough
Total time commitment: 10 minutes actively doing things, 45 minutes cooking; not including actually making the bolognese and white sauce
Recipe from common sense/Mum's advice
2 quantities of bolognese sauce
1-2 quantities of white sauce, depending on your mood
Lasagne sheets
Extra cheese
1. Preheat oven to 180C. Get a large baking dish and layer it with half of the bolognese sauce.
2. Top with lasagne sheets so you're covering the top of it.
3. Add the rest of the bolognese.
4. Add more lasagne sheets.
5. Pour the white sauce over the top. Mmm, delicious.
6. Grate extra cheese on top. Even more delicious.
7. Pop it in the oven and cook until the cheese is golden and delicious and the lasagne sheets aren't chewy any more. It will probably collapse a bit as you serve it, embrace it as the joyful mess of lasagne.
DELICIOUS JOY.
Friday, April 15, 2011
Gluten Free Friday: Bolognese Sauce
This is one of my favourite staples, but somehow I managed to spend 14 months living out of home before making it. The recipe is amazingly straightforward, requires very little active cooking time, and is delicious.
Are you sold yet?
I know its a bit mean putting something you traditionally eat with spaghetti as a GFF post, but there are a bunch of other ways you could use this! I'm thinking of subbing tomatoes for salsa and basil and oregano for chilli flakes and having it on top of nachos, because that's how I roll.
BOLOGNESE SAUCE
Serves
Total time commitment: 15 minutes, plus simmering
From my mum's recipe
1 onion, diced
500g mince
1 carrot
50g tomato paste
400g can diced tomatoes
Basil and oregano, to taste
1. Heat some olive oil in a pan and cook the onion.
2. Add mince and cook until browned.
3. Peel and dice the carrot, and add to pan. I added broccoli stalk and zucchini for extra vegetable power, what of it.
4. Add tomato paste, diced tomatoes, and basil and oregano, and simmer until everything is cooked, the carrot/vegetables is/are tender, and it isn't overly liquidy.
Labels:
baking basics,
easy,
gluten free,
italian,
main,
sauce
Friday, March 25, 2011
Gluten Free Friday: The Best Nachos This Side of the Continent
~Today's GFF meal was cooked by Levi, because I've been cooped up with a cold/hayfever all week and was too lazy ill to cook ~
One is from London. We walked everywhere around London that day, made lots of jokes about Tom being our Tom-Tom because he knew where everything was, and posed for some silly photos (see exhibit A)
Did I mention it was THIRTY TWO DEGREES that day? The actual temperature itself isn't shocking (um, hello, I'm from Australia) but the fact that I was in LONDON when it was 32C was a bit weird. It was in the papers the next day. And by the papers, I mean The Sun. Which is hardly a reputable news source.
So the second hurricane glass was from Paris, where Levi and I spent exactly 48 hours, got lost a bit (we walked for the first two hours we got there trying to find a specific metro station), got free entry into The Louvre and the Musee D'Orsay, went all the way back to the Eiffel Tower from the Arc de Triomphe for more banana and nutella crepes, and had Milka chocolate and pint cans of beer for dinner. The second day, we skipped breakfast and headed straight for the Hard Rock Cafe, where we had this esteemed table
That's totally Bob Dylan's harmonica.
So this is where my nacho revival really kicked in - the nachos I had there were the BEST nachos I've ever eaten, and I've had many a nacho in my time. I don't know if it was because I was really hungry, or that they were using French cheese, but OMGA (oh my giddy aunt, get onto that phrase) they were amazing. And I've recreated them at least once a month since.
NACHOOOOS
Serves two really hungry people who will then complain about being too full, or four reasonable people
Total time commitment: 20 minutes
*Apparently some corn chips aren't gluten free, so if you are intolerant I suppose you know what is happening with all that bizniz but check before you eat them*
1 bag corn chips
400g can red kidney beans
Lots of cheese
Salsa and avocado/guacamole, to serve
1. Empty the corn chips into a dish and preheat your oven to 180C.
2. Drain the kidney beans and put them over the corn chips
3. Grate a buttload of cheese onto the top, and put the dish in the oven until the cheese melts
4. Serve with salsa and your chosen medium of avocado.
Friday, March 18, 2011
Gluten Free Friday: Lentil Loaf and Bento Boxes
I've developed a sort of system to get me through the weeks now that uni is back on, and I still have work and panto and bi-weekly sewing days at Grandma's (which is where I'm headed this afternoon and I can't wait!).
Actually, before I get onto that, I've had a quest for about six months to buy a bento box. It started out as an "Oh, wouldn't that be cool?" idea, then Tara gave me Lunch box Revolution for Christmas.
I was totally sold on the idea when Levi and I went into (probably) every Morning Glory store in Sydney and Melbourne, but I *still* couldn't find one that was exactly perfect. Then I got home and looked on a bunch of websites, until finally I realised that eBay would probably help. Help it did, my friends! On Monday, my bento box arrived and it is splendid. I recently bought a satchel for uni, and this is so much more spatially economical than three different containers (which means the bag actually closes, something I thought I might never see). Also, so many adorable bento accessories! So this is my new lunchbox (don't even get me started on the quest before this for a regular lunchbox):
As you can see, its from eBay seller blueberryland, and I had absolutely no problems with them. Free P&H? WHEN YOU'VE MADE THE SALE, STOP SELLING! Although, I would recommend getting one with a fork, or having a miniature fork that fits in the fork section, but if you don't its a good place to sneak some biscuits or other reasonably flat treats.
So we're all sold on the idea of a bento box, or at least a reasonable lunchbox? Good good. Let's get on to my brilliant system then.
As I briefly mentioned with the pumpkin scone recipe, some days you just need to grab and run when it comes to breakfast. For me, thats Thursdays when I start uni at 8:30 and need to get the bus by 7:15. Wednesdays aren't *too* much better - I start at 9:30 but I'm normally rushing around printing lecture notes so I don't have time to cook breakfast. Both of these days are pretty full-on as well - Wednesday I have uni 9:30 - 4:30, and Thursday 8:30 - 5:30 (with a four-hour gap in the middle on Thursdays, remember I'm doing an Arts degree!). So the system: Spend Monday and Tuesday, when I'm essentially free until 3:30, cooking lunch and breakfast for the week.
(This is all relevant, I promise)
This week's lunch was lentil loaf! Hurray, relevance! This is a great recipe because you can make it quite easily and add a whole bunch of stuff or make any amount of substitutions (some are included in the notes at the end). I've made it twice, the first time I added red kidney beans and mushroom, and the second time I added cooked sweet potato. Good. Times.
Also, The Uber-Blonde is a benevolent blogger and let me use her photo because I managed to forget all week and now its all eaten up.
LENTIL LOAF
Makes 10 serves
Total time commitment: 30 mins prep, 45 mins cooking time
Recipe from Baking It, who adapted it from Eat Me, Delicious
1 can cooked lentils, drained (or 1 1/2 cups cooked lentils)
2 cups rice
2 cups grated cheese
1 cup tomato sauce
4 eggs, lightly beaten
4 tsp soy sauce
2 tsp minced garlic
Herbs to season
Any additions you may have
1. Preheat oven to 180C and grease a large baking dish.
2. Combine all ingredients in a bowl and pour into the baking dish.
3. Bake for 45 minutes. Cool for 5 minutes before cutting and serving.
NOTES/SUBSTITUTIONS:
- Rice can be substituted for oats, millet, bulgur. Obviously oats aren't GF, so don't do that if you are intolerant, you nong.
- Tomato sauce can be substituted for BBQ sauce, salsa
- Substitutions looks like it has too many t's
- Nutritional info (per serve): 185.3 cal, 6.7g fat, 1.8g sugar
Labels:
gluten free,
life,
main,
other blogs,
products,
vegetarian
Friday, March 4, 2011
Gluten Free Friday: Leek and Parmesan Risotto
I don't want to constantly "resort" to rice as a staple of my GFF meals, so I'm trying to avoid it entirely, but this was too good to pass up. I bought a bunch of leek on a whim at the farmers' market (goodness knows why, because its a winter vegetable and we're in the middle of a darn heatwave, so it was expensive) and had to find a way to use it all up once it was cooked. This ticked all the boxes for a weekend meal - quick, easy, not too many ingredients, delicious, and I didn't have to think too much to cook it. Perfect, no?
If you've read my previous risotto recipe, I found a rather ingenious way to cook risotto on Not Quite Nigella that doesn't involve slaving away over a hot stove for 40 minutes. Just for funsies, I actually made risotto the *proper* way for the Vigilante one night, and it didn't taste markedly different. Actually, I hated that risotto, but thats another story for another day.
LEEK AND PARMESAN RISOTTO
Serves 4
Total time commitment: 45 minutes (including 20-30 minutes cooking time)
2 leeks
Parmesan
1 1/2 cups Arborio rice
4 cups stock, heated
1. Preheat oven to 180C. Place rice and stock into a large baking dish, cover with alfoil and bake for 30-40 minutes.
2. Meanwhile, wash the leeks carefully and cut into discs, discarding the root and dark green leaves.
4. Cover the leeks with water in a large pot. Bring to the boil and simmer for 30 minutes.
5. Combine leek and rice, serve and top with cracked pepper and parmesan to taste.
Thursday, February 24, 2011
Gluten Free Friday: Lentil & Vegetable Soup
Taking advantage of how overcast it was on Sunday, I made this soup from one of my vegetarian cookbooks in some sort of vague hope that if I was eating soup, surely the weather would have to stay cool. The photo is a testament to how cloudy it was - this was taken with all of the windows open and it still looks quite dark! I was going through my blog archives trying to find a particular post yesterday and cringed at some of the photos, but that still didn't motivate me to edit this to look better. What can you do, I'm still on holidays and living up my laziness before uni starts again.
LENTIL & VEGETABLE SOUP
Original recipe from Vegetarian Cookbook
Serves 8
Total time committment: 1 hour (most of which is waiting 10 or 20 minutes for things to cook)
3 leeks, finely sliced
3 carrots, diced
2 celery sticks, diced
200g can cooked brown lentils (near enough is good enough)*
75g rice
1L vegetable stock
8 corn on the cobs
1. Heat olive oil in a large saucepan over medium heat and add leeks, carrots and celery. Cover and cook, stirring occasionally, for 5-10 minutes. Stir in rice.
2. Stir in the stock. Bring to the boil, then reduce heat, cover and simmer for 20 minutes over a medium-low heat. Add the corn on the cob and lentils and simmer, covered, for 10 minutes or until rice is tender.
3. Season to taste and serve.
*You can also use 115g dried lentils, as the original recipe suggests, and add them when you add the rice in step 1.
Saturday, February 12, 2011
Tortilla Lasagne
Mum made this for dinner a few weeks ago so I tried to recreate it to feed the Boy and my Producerpants buddy, because we were all fast at work writing short stories on my typewriter about a man named Gordon Crevats. Not for any particular reason, just that we like the clicky-clacky sound of the typewriter. There's also a play being written on the typewriter, every time someone comes over they have to add a line.
I didn't like this version as much as Mum's, she cooked beef in tortilla sauce (if I knew exactly what it was, I would have used it :P) and layered that with vegetables. This was more improvised, and if I make it again (if? when) I'll try beef or vegetarian mince. Then hopefully it won't fall apart quite so much :P
This is Producerpants. We're producing the next pantomime together, and she is delightfully talented and hilarious. We're also a detective team. And we make a lot of bad puns brilliant puns.
I didn't like this version as much as Mum's, she cooked beef in tortilla sauce (if I knew exactly what it was, I would have used it :P) and layered that with vegetables. This was more improvised, and if I make it again (if? when) I'll try beef or vegetarian mince. Then hopefully it won't fall apart quite so much :P
TORTILLA LASAGNE
Serves 6
Total time commitment: 30 minutes
6 tortillas
400g Pinto beans
120g corn kernels
6 button mushrooms, sliced
1 cup diced capsicum (I used red, green and yellow)
1/2 brown onion, diced
1 tsp minced garlic
Chilli flakes
Olive oil
100g salsa
Jalapenos to taste
Cheese to taste
1. Preheat oven to 180C. Cook onion and garlic in a little olive oil. When onion is translucent, add mushroom, capsicum and chilli flakes and cook until tender.
2. Drain beans and corn (I presume you got these in a can) and combine in a large bowl with onion, mushroom, capsicum and salsa. Add jalapenos if you want!
3. Layer two tortillas in a baking dish to make the base of the lasagne. Top with half of the mixture, and repeat so you have three layers of tortilla and two of mixture. Top with cheese and pop in the oven for ten minutes or so. Voila!
Monday, February 7, 2011
Prosciutto, Sage and Pumpkin Spaghetti
Firstly, can I just say, why does GO! have an ad for Harry Potter that is some kind of rap using lines from the film? What is even happening there?
Ok. I'm glad we got that out of the way.
Because now, we can get on to one of the most delicious pastas I have cooked in a while. When I was visiting Grandma and Grandpa a while ago, I was lamenting that now I don't get the recipe liftout from the paper any more, so Grandpa started collecting them for me. Isn't that just the best? This is a Marg Johnson recipe I've taken from my collection. With added feta, just for kicks.
While I've got you here - is anyone else sick of Valentine's Day things already? I just DON'T CARE. Although I saw this on a craft blog and I think its appropriately cute and lacking in pink and hearts.
PROSCIUTTO, SAGE AND PUMPKIN SPAGHETTI
Original recipe by Marg Johnson
Serves 4
Total time commitment: 40 minutes. Most of this is waiting for the pumpkin to roast, so if you can pre-cook the pumpkin the time will be cut down to around 20 minutes.
Olive oil
1/2 large pumpkin or 1 small pumpkin, cut into chunks
Handful sage leaves
1 tbsp garlic
Chilli flakes
100g prosciutto
400g spaghetti
1. Place the cut pumpkin into a baking dish, drizzle with olive oil, and top with garlic, sage leaves and chilli flakes. Doesn't that look like it's going to be delicious?
2. Cook at 200C until tender. You need to be able to stick a fork through the pumpkin. This should take about 25-30 minutes.
3. Meanwhile, bring a pot of water to the boil and cook the spaghetti. When the pumpkin is just about done, place a tray with the prosciutto in a single layer in the oven. Cook it for about ten minutes until its crispy.
4. Time to combine everything! Place the pumpkin and pasta in a large bowl and toss to combine. Crumble prosciutto and feta on top and serve.
Ok. I'm glad we got that out of the way.
Because now, we can get on to one of the most delicious pastas I have cooked in a while. When I was visiting Grandma and Grandpa a while ago, I was lamenting that now I don't get the recipe liftout from the paper any more, so Grandpa started collecting them for me. Isn't that just the best? This is a Marg Johnson recipe I've taken from my collection. With added feta, just for kicks.
While I've got you here - is anyone else sick of Valentine's Day things already? I just DON'T CARE. Although I saw this on a craft blog and I think its appropriately cute and lacking in pink and hearts.
How to make custom fingerprint art on ManMade
The original recipe called for 2tbsp lemon juice to be added to the pasta when you're combining it, which I didn't do because I didn't have any. I don't think it would go that well with the feta - any opinions?
PROSCIUTTO, SAGE AND PUMPKIN SPAGHETTI
Original recipe by Marg Johnson
Serves 4
Total time commitment: 40 minutes. Most of this is waiting for the pumpkin to roast, so if you can pre-cook the pumpkin the time will be cut down to around 20 minutes.
Olive oil
1/2 large pumpkin or 1 small pumpkin, cut into chunks
Handful sage leaves
1 tbsp garlic
Chilli flakes
100g prosciutto
400g spaghetti
1. Place the cut pumpkin into a baking dish, drizzle with olive oil, and top with garlic, sage leaves and chilli flakes. Doesn't that look like it's going to be delicious?
2. Cook at 200C until tender. You need to be able to stick a fork through the pumpkin. This should take about 25-30 minutes.
3. Meanwhile, bring a pot of water to the boil and cook the spaghetti. When the pumpkin is just about done, place a tray with the prosciutto in a single layer in the oven. Cook it for about ten minutes until its crispy.
4. Time to combine everything! Place the pumpkin and pasta in a large bowl and toss to combine. Crumble prosciutto and feta on top and serve.
Sunday, February 6, 2011
Chickpea burgers
I'm back! Hello! I apologise, I've had a lot going on lately. Mainly, saying goodbye to my superawesome grandad (epic sadface), but also happy things like watching Bored to Death and Misfits, rearranging the house, joining an indoor beach volleyball team and starting a new job as a music teacher!
Today, though, I finally got around to cooking something new to post. So that was nice. And I'm planning to keep that up! I've felt guilty about not posting anything, but I haven't exactly been living on blogworthy food, and if I have, I haven't been taking photos. So all in all, that wasn't going too well.
I busted out my new/old food processor for this! Grandad gave it to me a few months ago and this was the first time I've used it. Food processors are the BOMB. I want to use it all the time. Probably because Boy offered to do the dishes so I didn't have to deal with cleaning it, I will keep you updated on my new opinions once I've had to clean it myself :P
I made quite a few substitutions in this recipe (link below), just because I wanted to use things I had on-hand rather than go out and buy more stuff. They worked out really well, in my opinion!
CHICKPEA BURGERS
Original recipe from Adrienneats.
Makes 6 standard-sized burgers.
Total time committment: 30-40 minutes.
Olive oil
1/2 small red onion, diced
1/2 tsp ground cumin
2 tsp curry powder
3 tsp minced garlic
Water
400g chickpeas
1/4 cup plain flour
1/4 cup dry cous cous, cooked*
1. Heat olive oil in a pan over medium heat. Add the diced onion, cumin and curry powder, and saute until translucent. Add garlic and cook for a few more minutes before removing from heat.
2. Place cooked mixture and a small drizzle of water - we're talking the equivalent of juice from one lime - in a food processor and pulse until smooth.
3. Add remaining ingredients and another drizzle of water, and blend until the mixture forms a thick paste.
4. Flour up your hands, because we're about to make some burger patties! Shape the mixture to your desired size and thickness, coating in a little extra flour to stop them from becoming sticky.
5. Either fry or bake the patties, depending on your preference. I baked mine for ten minutes at 180C, and they were crispy but still moist.
*Cous cous can be prepared really quickly while you're frying the onion - Put the 1/4 cup dry cous cous in a bowl, just cover with boiling water, and place a plate over the top of the bowl to keep the moisture in (? is that scientifically correct?) and make it delicious.
Wednesday, December 1, 2010
Danish Fritters
Take note, dear readers. This is my favourite recipe ever. I only acquired the actual recipe a few weeks ago, but its a perennial favourite, it is...
If I remember correctly, this is a recipe from The Pennywise Cookbook, which is an old softcover that Grandma still has. Mum never made these for us, but Grandma always did, so we always begged her to make them (or get chicken and mango rissoles from the butcher, but that's another story).
So please treasure this recipe. It is delicious and easy and goes really well with mashed potato and boiled veges and plum sauce. I'll admit, I adulterated it a little bit, but only in that I didn't sieve the flour! Why would you tamper with perfection?
DANISH FRITTERS
Serves four hungry students
500g mince
One small onion, finely chopped
Salt and Pepper to season
1 egg, beaten
300mL milk
Oil for frying
1. Stir the chopped onions into the mince.
2. Mix (...or sieve, if you are so inclined) the flour, salt and pepper into a bowl.
3. Gradually blend the beaten egg and milk into the flour to make a smooth batter.
4. Stir the mince and onion mixture into the batter, and set aside for half an hour. Watch some 30 Rock or The Office. Find your 30 minutes of daily exercise. Read a chapter of a book. Its entirely up to you, really.
5. You're back? Good! Heat the oil in a frypan. If you just got your 30 minutes of exercise, I apologise for making you stand in a hot kitchen for the next step.
6. Spoon rounded tablespoons of the mixture into the hot oil. Lower the heat and fry fritters, turning as you need to, until the batter is crisp and the meat is cooked through. I then leave them on a paper towel to remove excess oil, but each to their own!
Food from Grandma's house!
If I remember correctly, this is a recipe from The Pennywise Cookbook, which is an old softcover that Grandma still has. Mum never made these for us, but Grandma always did, so we always begged her to make them (or get chicken and mango rissoles from the butcher, but that's another story).
So please treasure this recipe. It is delicious and easy and goes really well with mashed potato and boiled veges and plum sauce. I'll admit, I adulterated it a little bit, but only in that I didn't sieve the flour! Why would you tamper with perfection?
DANISH FRITTERS
Serves four hungry students
500g mince
One small onion, finely chopped
Salt and Pepper to season
1 egg, beaten
300mL milk
Oil for frying
1. Stir the chopped onions into the mince.
2. Mix (...or sieve, if you are so inclined) the flour, salt and pepper into a bowl.
3. Gradually blend the beaten egg and milk into the flour to make a smooth batter.
4. Stir the mince and onion mixture into the batter, and set aside for half an hour. Watch some 30 Rock or The Office. Find your 30 minutes of daily exercise. Read a chapter of a book. Its entirely up to you, really.
5. You're back? Good! Heat the oil in a frypan. If you just got your 30 minutes of exercise, I apologise for making you stand in a hot kitchen for the next step.
6. Spoon rounded tablespoons of the mixture into the hot oil. Lower the heat and fry fritters, turning as you need to, until the batter is crisp and the meat is cooked through. I then leave them on a paper towel to remove excess oil, but each to their own!
Tuesday, October 19, 2010
Tofu noodles
The smell of the stir fry sauce I bought reminds me of summer holidays, because there was one holiday where almost every day for lunch I made these. Minus the tofu, though, I wasn't quite as adventurous then. I still haven't found a really good way to cook tofu, so hit me up with suggestions!
2. Boil the kettle and pour it over the Hokkien noodles for a couple of minutes, to let them separate.
I've spent today watching Criminal Minds and snacking on Subway cookies (white chocolate and macadamia, natch). I probably should have started studying for exams, but I love Matthew Gray Gubler too much. Also, uh, I study psychology, so that counts... right?
Also, while I have your attention, how adorable are these chopsticks? The Boy got them for me for my birthday, along with heart-shaped measuring spoons. I think my adorable kitchen things need their own entire blog post, js.
TOFU NOODLES
Serves four
Also, while I have your attention, how adorable are these chopsticks? The Boy got them for me for my birthday, along with heart-shaped measuring spoons. I think my adorable kitchen things need their own entire blog post, js.
TOFU NOODLES
Serves four
220g Hokkien Noodles
Stir fry vegetables - these can be frozen or fresh. I used mushrooms, carrot, peas, green beans and capsicum.
300g firm tofu, cubed
Stir Fry sauce/seasoning
1. Chop up the vegetables (unless you have pre-cut frozen ones - lucky you!) and fry them in the pan with the cubed tofu
Surprise! Process photo!
2. Boil the kettle and pour it over the Hokkien noodles for a couple of minutes, to let them separate.
3. Pour the sauce over the noodles and let that simmer in its own goodness for a spell
4. Add the noodles, mix it all together, and there you have it! I had a spicy sauce so (having learnt from previous summer lunches) threw some natural yoghurt on the top to balance it out.
Sunday, October 10, 2010
Roast Pumpkin, Feta and Walnut Pizza
Following yesterday's pizza bases recipe, this is my favourite pizza ever. EVER. Hands down. And I love me some pizza.
ROAST PUMPKIN, FETA AND WALNUT PIZZA
One pizza base
Roast Pumpkin
Feta
Spinach
Basil Pesto
Walnuts
Parmesan Cheese
1. Cover the base with pesto. Delicious, delicious pesto.
2. Put a layer of spinach over the pesto
3. Put some pumpkin over the spinach.
4. Crumble feta over the pumpkin
5. Break up the walnuts and sprinkle them over the pizza
6. Grate some parmesan on top
7. Bake that bad boy until it looks delicious. And it will be. Trust me on this one.
Sunday, October 3, 2010
Taco Night!
This is something T & I are hoping to make a weekly thing. Which will probably happen because I love tacos, and they are so gosh-darn simple to make! I realised we didn't have any seasoning when I got home, so I invented some, and I'm going to go all P-Dubz and show you photos of each step. Because I like that about her recipes.
TACO SEASONING
1. Put some minced or crushed garlic into a bowl and cover with Sumac. Sprinkle on some chilli flakes, salt and pepper

3. Combine it all unti it looks gross like this and is to your tastes.
Then you just add it to some browned mince! I think I'll have to refine this later, but it wasn't horrendous. And this is what the plate looked like (sans mince):
Monday, September 27, 2010
Gordo's Fish
It almost pains me to post this recipe, because as much as I love Gordo (so named for his resemblance to this guy right here - Lizzie McGuire, anyone?), he seems to hate my cooking. Except for these cupcakes. I know the first time, it was because I made him stir-fry for me to eat at 5pm, so by the time he'd finished an exam at 6pm and walked across campus to the theatre, it is completely understandable that the rice was dry and that is not a reflection on my cooking. Everything else though, I have no idea :P
So during our weekly shopping trip, this is how he suggested I cook my fish next time. Which was about half an hour ago. And then I ate it and forgot to take a photo. Oops.
GORDO'S FISH
Serves one
1 fish fillet - I don't even, how much are you meant to eat? I just asked for one and the lady gave it to me.
Half a lemon
One potato
Salt
Pepper
Vegetables
1. Make three or so slits into the fish on each side
2. Rub each side with lemon juice and season with salt and pepper
3. Cut up the potato into chips and put them in the oven
4. Prepare the vegetables how you wish. I'm lazy and used frozen ones.
5. Fry the fish
6. Put everything on a plate.
NOM.
Wednesday, August 25, 2010
Pumpkin Gnocchi
I made this once with a white sauce, and then froze the rest of the gnocchi and cooked it last night with a tomato sauce. Both were perfectly acceptable.

PUMPKIN GNOCCHI
2 cups cooked, mashed pumpkin
2 cups plain flour
1. Mix together
2. Flour the bench and roll out a handful of the dough into a sausage shape
3. Cut it up into bite-size pieces. Do this for all the dough.
4. Cook the gnocchi in boiling water until it rises to the top of the saucepan
5. If you want to freeze some, squirrel it away now! If not, eat it with all its delicious goodness.
Monday, August 2, 2010
Three Cheese Risotto

1 1/2 cups arborio rice
1 1/2 cups cheese (I use grated Tasty and Parmesan and crumbed fetta)
4 cups vegetable stock
1. Heat the stock while you grate the cheese so that it is hot.
2. Put the rice and cheese into a baking dish. Mix them about a bit. (I KNOW, A BAKING DISH? Surely you must be crazy, Emily! I assure you, dear little apple, that I am not. Bear with me)
3. Pour over the hot stock
4. Cover the dish with alfoil and place in the oven that you clearly preheated to 200C for 40 minuten.
Mine still comes out a bit runny, but that doesn't make it taste any less delicious, let me tell you. I tried adding mushrooms and other vegetables but the troops protested. Hopefully you have more luck, let me know if you find a splendid variation!
Wednesday, July 14, 2010
Mediterranean Pasta
This was a quickly put-together lunch by me and Spazzy McGee after we decided that the tapas menu at the cafe we attended didn't look as good as we anticipated. Today was a little upsetting as I slept in (+5!) and then went to the airport to see my Sensei off on his 6 month European/American trip (-20).
I sent him off with my Phantom of the Opera medallion (in lieu of the St Christopher medal that I think is at my parents' house) and a note to keep in his wallet saying "I miss you like fuck", so hopefully that will keep him safe and happy until January!
This pasta was delicious and rather bastardised from a recipe Mama and I found in the newspaper that was essentially cherry tomatoes and basil leaves cooked in olive oil and garlic, tossed through spaghetti. In hindsight, I could have used some basil leaves from the plant I have going on my windowsill, but that is for next time.

MEDITERRANEAN PASTA
50g Pitted Kalamata Olives
25g Stuffed Green Olives
50g Sundried Tomatoes
25g Cherry Tomatoes
1 tsp crushed garlic
Drizzle of Olive Oil
Spaghetti
1. Heat the olive oil and garlic in a pan
2. Halve olive and tomato ingredients and fry in pan with olive oil and garlic. Add basil leaves if you remember and/or wish!
3. Cook the spaghetti while all this is going on. Hopefully you read the whole recipe first so this isn't going to get awkward with the other ingredients cooling before the pasta is done.
4. Toss the spaghetti in the other ingredients (or toss the other ingredients in the spaghetti? I'm not sure how that works. COMBINE THEM) and enjoy!
Subscribe to:
Posts (Atom)


