Oh my goodness, guys. I think I totally beat the cheeseburger recipe in terms of Most Delicious Burgers Ever. Also, these were much simpler, which makes it even BETTER. I've been following the blog Stonesoup for a while now, since I decided to learn to make sourdough and found a recipe on Jules' site (for the record, it was incredible, I just never got a good enough photo to post the recipe; if you are interested you can find it here. Also I understand that I have only been posting phone pictures lately which makes that reasoning invalid). The recipes are delightfully simple, and most contain less than 5 ingredients which is so great. The bonus with these burgers is that most of the ingredients I would generally have on hand anyway! Except bread. I've only just started keeping a loaf of bread in the freezer, I don't eat enough to warrant always having a fresh loaf in the house, let alone rolls! (Honestly, though, I live within walking distance of at least three shops so its no big deal to run out and get some, which means this recipe is a-ok with me)
The burgers are really juicy without cooking them in oil, because the salt layer helps the juices to congeal and form a 'crust' on the burger. Is this common knowledge? It should be. I am so impressed with these burgers, you don't even know.
Just a disclaimer on the "quick" tag - the burgers are incredibly quick, the onions not so much - although I came home from work on Tuesday night and had made burgers and 2 onions' worth of caramelised onions in half an hour, so maybe I have unreasonable standards of what quick means. I've split the recipe into the two sections - burgers and onions - in case you're only making one part. Apparently the onions can be kept for about a month in the fridge, but I haven't tried storing them yet.
SALT-CRUSTED BURGERS
Serves 4 in a burger bun - if you're serving them without bread I would add a little extra meat per person, the original recipe called for 400g to serve two people
Total time commitment: 10 minutes
Recipe from Stonesoup
400g minced beef
salt
1. Heat a frypan on really high heat for three minutes. Shape the beef into the desired number of patties.
2. Sprinkle a fine layer of salt over the frypan and place the burgers on top. Cook for 4 minutes then flip, sprinkling more salt on the pan. Cook until they are done to your liking.
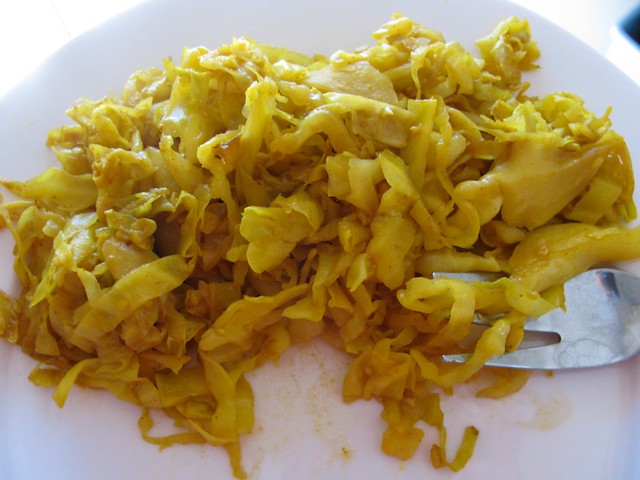
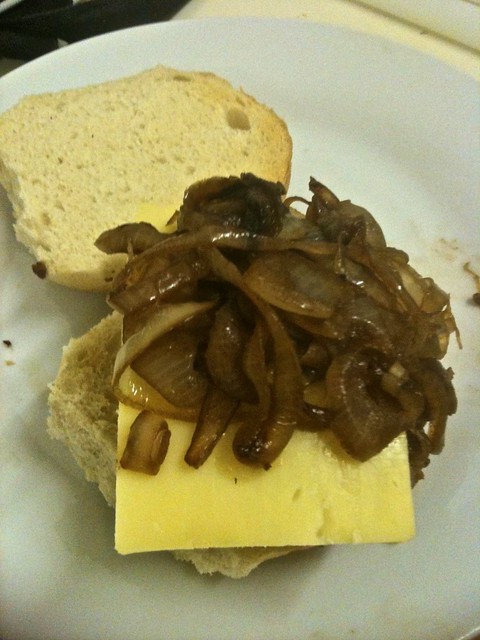
CARAMELISED ONION
Makes a lot
Total time commitment: Depends on how much onion you have, but this took me 20-25 minutes and I only waited until a few of the onions had browned.
Recipe from Stonesoup
2 onions, thinly sliced
Balsamic vinegar
1. Heat olive oil in a large pan. Add onions and cook, covered, until the onions are dark brown, stirring every 5 minutes or so. As I mentioned in the time commitment spot, I didn't brown all of the onions because I am both hungry and impatient.
2. Add a few splashes of balsamic vinegar and cook, uncovered, until the onion is soft. I added vinegar until it looked about the right colour, so do whatever works for you.
Showing posts with label quick. Show all posts
Wednesday, November 30, 2011
Wednesday, November 16, 2011
Rosemary and Honey Pecans
I found (and made) this recipe through a delightfully serendipitous turn of events. I was cruising Facebook instead of studying and Papermash linked to Sweet Paul magazine, which I had never heard of. I moseyed on over to have a look and this recipe came up. I had leftover pecans from the salted caramel pecans and was at Levi's house, which meant I had access to fresh rosemary to make it. Also, I was really bored of studying. In my defence, I did have an exam this morning so my brain wasn't functioning very well anyway.
I used a very scant cup of pecans, and ended up with a lot of honey/butter mixture sitting in the bottom of the dish. Don't get me wrong, it was delicious and I ended up drizzling it over the top, but I suspect if I used a full cup of pecans they would get crispier from not sitting in a puddle of delicious. Just a hunch, though, because the salted caramel pecans weren't necessarily crispy.
And did I mention how dishes-friendly this is? The original recipe said to melt the butter in a saucepan and then put it in a bowl with the other ingredients but bro, I have a microwave, I might as well just use one bowl. Next time I'm going to skip the bowl entirely and make it in the ovenproof dish from the get-go. One dish recipes are the GREATEST.
ROSEMARY AND HONEY PECANS
Serves 4, maybe? Are you serving them with cheese? I think thats a good idea. I should have done that.
Total time commitment: 15-20 minutes
Recipe adapted from Kate LeSueur in Sweet Paul magazine
30g butter
1/2 tsp salt
1/4 tsp ground pepper
1 cup pecans
2 stems rosemary
2 tbsp honey
1. Preheat oven to 165C. Melt butter in a bowl, add the rest of the ingredients, and mix to coat pecans.
2. Put in an ovenproof dish and cook until toasty.
Monday, August 22, 2011
Secret Recipe Club: Oven Stuffed Potatoes
So I mentioned that I had been on a microwaved potatoes kick just before uni started. My laziness aside, I just really like potatoes because they're easy, so I was pretty overjoyed when I found this recipe for stuffed potatoes on my SRC assignment this month! I was assigned to Gloria's blog, Canela Kitchen, and I fell in love with most of the recipes she has posted.
I adapted this recipe to make it vegetarian, and omitted the parmesan cheese coating (although will definitely make them again with the parmesan!). I really loved the end product, and making them almost bite-sized meant I could just pop them in my mouth while marathoning Mad Men. (I know, I'm four years behind everyone else, but goodness it is a good show)
OVEN STUFFED POTATOES
Serves 6
Recipe from Canela Kitchen
1 kilo potatoes, peeled
3 egg yolks
3 tbsp flour
Spinach and feta, to fill
1. Boil and mash the potatoes. Add the egg yolks and flour, and mix to form a dough. Preheat oven to 190C.
2. Wilt the spinach by rinsing it under cold water and then place it into a medium-hot frying pan with only the water that is still on the leaves for a couple of minutes.
3. Cut the feta into small cubes.
4. Form the potato dough into evenly-sized balls. Now that you have checked they're all even, squish down each ball and place a spinach leaf then a cube of feta (or more, depending on size) in each and re-shape into balls.
5. Place the balls on a baking tray and cook until browned (this will vary depending on size).
Check out the other members' recipes here!
Thursday, August 4, 2011
Lentil and Tomato Soup
Last week, I didn't do a meal plan. It was the last week of holidays and psssh, people have been surviving and not making meal plans for years, right? It turns out I am not one of those people that can survive without a meal plan. I think the disaster wasn't helped by shopping day moving from Monday to Thursday, so I had ten days between grocery shops, but I did end up eating essentially nothing but microwaved potatoes for two days.
I swear to goodness, if I didn't have friends living down the road to cook for me and let me eat their biscuits, I probably would have faded away to nothing.
So on Monday, once I had run out of potatoes, I decided to finally cook this soup. I got the recipe from one of the free Coles magazines, and actually had everything on hand to make it (its okay, I also wonder why I didn't make it earlier in the week). I have a five hour break on Mondays which gives me more than enough time to come home for lunch and whip something up. Also, I'd only eaten an apple before I went to uni and apparently they do not fill you up for four hours. Who knew? :P
I added some carrot to the soup to bulk it out a bit, and next time I think I will also add some green vegetables (peas and broccoli and the like) for colour and deliciousness. In the various incarnations of this soup (it makes four to six servings), I've had it with spinach, pine nuts, and bacon, and I'm sure there are a million other toppings you could try.
LENTIL AND TOMATO SOUP
Serves four to six
Total time commitment: 30 minutes
Recipe adapted from Coles Magazine
Cost: 68c per serve (if recipe makes 4 serves)
1 tbsp olive oil
1 onion, chopped
1 tsp ground cumin
1 tsp ground coriander
1 cup red lentils
1 carrot, diced
400 g diced tomatoes
3 cups vegetable stock
1. Heat oil in a large saucepan. Add onion and cook until soft. Stir in cumin and coriander and cook, stirring, for one minute.
2. Add lentils, carrot, tomatoes and stock. Bring to the boil, reduce heat, and simmer until lentils and carrot are soft (about 10 - 15 minutes).
Thursday, July 14, 2011
Sunday night side-dishes
On Sunday, I really couldn't be bothered to cook, and occasionally I leave Sundays off my meal planner because I lose steam when I'm planning or assume I'll have leftovers. This week was one of those weeks, and there was really nothing in the house except the better part of a 3kg bag of potatoes and some assorted vegetables. This started out as an attempt to make a variation on jacket potatoes that Mum used to cook us, where you scoop out the inside of the potato but leave a kind of potato-bowl-perimeter, mash it with some vegetables and cheese, and put it back into the potato. It didn't work out that way, so it ended up being a combination mashed potato. The honey carrots were there as a request from Levi, who had them at a friend's place last week and is obsessed with them now. Let's be honest, though, they're a favourite of mine as well. I haven't included the recipe because I'm still perfecting it!
The beauty of this mashed potato is that aside from the standard one-potato-per-person, the quantities and varieties of vegetable or cheese are entirely up to you and what's left in the pantry.
COMBINATION MASHED POTATO
Serves 2
Total time commitment: Varies depending on potato size, but roughly 30 minutes
Recipe adapted from Mama's jacket potatoes
2 medium-to-large potatoes
Frozen peas and beans
1 carrot, diced
A couple of florets of broccoli, chopped
Butter
Cheese
Tomato, diced
1. Steam the potatoes and vegetables (excluding tomato) in whatever way you prefer - microwave or stove top. If you have an hour spare, you can roast the potatoes, but for this I don't bother. Grate some cheese while you wait.
2. When they are done, cut the potatoes into small cubes (don't burn yourself, please) and put into a bowl with some butter. Mash until they are suitably mashed to your taste. Add the steamed vegetables, diced tomatoes, and grated cheese, and combine. The cheese should melt into the potato and be all delicious. Best eaten while sitting on the couch watching some trashy television.
Sunday, June 19, 2011
Aunty Mel Biscuits
So I don't know if I even mentioned it on the blog, but I went to visit interstate family members in January, and that was pretty rad. I tried to explain my gigantor extended family in December and did a fairly shocking job of it, so to put it simply:
- Big cousin's 21st in Sydney on New Years Eve
- Levi and I took her little sister to Melbourne with us because her parents were going to come over here for my uncle's birthday
- Little Sister Cousin is the same age as Godsister Cousin, who is obviously the daughter of my extraordinary godmother/aunty/all-around cool dude, Aunty Mel.
- Did lots of shopping.
Aunty Mel gave us these biscuits while we were in Melbourne and they were so amazing I took a photo of them. Here they are.
Don't they look delicious? If you answered yes, you are correct. You know what is the best thing about these biscuits? The recipe makes about 100. I'm not even being hyperbolic. I made these biscuits in March, and I just used up the last frozen roll of dough this morning. The dough freezes really well, and not being someone who actually buys biscuits regularly, it was nice to know I had something ready for when Mum and Dad come over, or to take to Grandma's, or whenever I wanted something sweet. I'm not going to lie, I probably averaged an entire log of mixture that was eaten straight from the freezer. Grab a log, unwrap the top, cut a chunk off, eat. I'm such a student.
Oh hey, bag of potatoes and green tea sitting in the background. What up. The tea is Buddha's Tears, if you are playing along at home, and is amazing.
AUNTY MEL BISCUITS
Makes 100
Total time commitment: 20 minutes
Recipe from Aunty Mel
500g butter
1 cup sugar
400g condensed milk
5 cups flour
1. If you want biscuits soon, preheat the oven to 180C, otherwise you can freeze the dough for a later date. Soften the butter.
2. Cream together butter, sugar and condensed milk.
3. Slowly add flour. If you want to add anything (AM recommendations: choc chips, or coconut and cherries), do it now.
4. Divide into five or so lumps and roll into logs. Roll up the logs in cling wrap, and refrigerate (for now) or freeze (for later). Refrigerating the mixture for five minutes or so makes it easier to work with.
5. Remove your dough from the fridge/freezer. Make sure the oven is at least on, if not preheated, I often let it heat up as I prepare the dough. Line a baking tray with baking paper.
6. Cut off 1cm-ish pieces of dough and roll in your hand until they are malleable. I had to roll the dough then flatten it to warm up the stubborn centre part of the dough-ball, do whatever you need to. If you want to make flat biscuits, flatten the ball with a fork on the baking tray.
For jam-drop biscuits, press a dent into the centre with your thumb and fill with a little jam (too much and it overflows and burns and hurts your tongue when you eat them straight out of the oven).
I've also made these with a sliver of almond pressed into the top and they were good.
Bake until golden but not browned.
Tuesday, May 10, 2011
Pasta with Peas
I've spent the last two days trying to post and blogger hasn't been loading. How awkward for blogger.
This recipe is one that, as the book says, could probably be whipped up in the depths of a nuclear winter. Considering how quick and easy it is, I was expecting it to taste a lot more bland than it did. I actually timed this to see exactly how long it took to cook - 22 minutes and 7 seconds - but most of that was waiting for the pasta to boil. It was very easy and didn't take a lot of effort, which is what you need on a Sunday night.
PASTA WITH PEAS
Serves three
Total time commitment: 22 minutes 7 seconds
From the second Leon cookbook
1 leek
1 onion
Olive oil
Bit of butter
Garlic
Peas
Parmesan
Pasta
1. Boil some water for your pasta. I think you can cook the pasta without much direction.
2. Heat a little bit of oil and butter in a pan. Don't have the heat too high or it will burn. While this is warming up, or beforehand if you are not speedy with your knife skills and worry about hot oil spitting at you out of the pan, cut up the leek (thinly) and onion (diced).
3. Chuck some garlic in the pan for extra flavour, and then add the leek and onion. Let them soften a bit.
4. Add some peas - I didn't measure, just added until it looked nice.
5. Hopefully your pasta is done - top the pasta with leek and pea mix, and top that with as much parmesan as you can handle.
Wednesday, May 4, 2011
Spicy Burmese Cabbage
So I mentioned my new cookbook, and I am so excited to own it. I was so excited to post it that I didn't even explain why I am so darn excited about it. Remember that whole England escapade in 2009? Levi's friend took us to this place with food and I was like "Eh, sweet potato falafel, looks a bit expensive but I'll get it." NOT EXPENSIVE FOR HOW MUCH YOU GET. OMG. I was so pleased I took a photo.
100ml hot water
Garnishes - chopped fresh coriander, peanuts, sesame seeds, whatever tickles your fancy.
1. Slice cabbage thinly. Heat oil in a pan, and chuck on the garlic with it (the recipe says to do this after the cabbage, but because I was using minced garlic/am a maverick I swapped it around). Put the cabbage in the pan and let it soften for a minute or two.
2. Meanwhile, add turmeric to the hot water, stir until smooth, and then add the lemon juice and soy sauce.
3. Back to your delicious cabbage - add the hot water concoction and watch it change colour.
4. Stir for a minute or so, add any garnishes you want, and serve however it pleases you.
I actually pulled this picture from Facebook (I was sure I had one of the actual food, but nonetheless) and it is captioned "I will miss you, Leon, and your tasty sweet potato felafel."
So when I was walking past a new cafe near my place a couple of months ago and saw the spine of a Leon book in there, I ran in and opened it and was excited and then ran back out to text Levi a picture of it. Lois was there, she can verify. And now I own the book (albeit the second one, which doesn't have the sweet potato felafel recipe, but I DONT EVEN CARE)! Huzzah!
HUZZAH, I SAY.
I was kind of skeptical about this recipe, because I've never had cabbage outside of coleslaw. I'm not entirely sure why it was the first recipe I decided to cook from it, to be honest, but it ended up being delicious. I think it would be good with the little black seeds they have on turkish bread on it. We ate it with plain rice, and it was great and filling. The recipe is insanely easy, and I've pared it down even more because I hate peanuts (you heard me) and I didn't want to buy fresh ginger or garlic, and couldn't use fish sauce because I was cooking for Levi.
SPICY BURMESE CABBAGE
Serves 2 hungry people (eaten with rice) with leftovers for tomorrow, or 4 as a side dish
Total time commitment: 15 minutes
Adapted from the Leon Cookbook, numero 2!
400g green cabbage
Ginger
3 cloves garlic
1 tsp turmeric
Juice of half a lemon
1 tbsp soy sauce
2 tbsp olive oil100ml hot water
Garnishes - chopped fresh coriander, peanuts, sesame seeds, whatever tickles your fancy.
1. Slice cabbage thinly. Heat oil in a pan, and chuck on the garlic with it (the recipe says to do this after the cabbage, but because I was using minced garlic/am a maverick I swapped it around). Put the cabbage in the pan and let it soften for a minute or two.
2. Meanwhile, add turmeric to the hot water, stir until smooth, and then add the lemon juice and soy sauce.
3. Back to your delicious cabbage - add the hot water concoction and watch it change colour.
4. Stir for a minute or so, add any garnishes you want, and serve however it pleases you.
Friday, April 29, 2011
Curried Lentil Dip: Gluten Free Friday
I've had this recipe bookmarked for ages. It looked so good when I found it in my reader, so I diligently bookmarked it, and then remembered that I very rarely eat dip.
However, I bought a weekly meal planner the other week (not that meal planning is new for me, but having a nice, pretty meal plan on the fridge door is) and while I was trawling through my recipes, I thought WHY ON EARTH NOT.
Result? Good. I forgot how amazing Tahini is, Mum and I used it a lot making my various vegetarian dishes but I haven't had any for ages. Sesame seeds are the bomb. My dip ended up looking a little less green than the original recipe, because I didn't have any fresh herbs on hand and I didn't think dried parsley and cilantro would have the same effect. It was also a bit too spicy for my weak-ass mouth, but I still ate a darn good lot of it.
CURRIED LENTIL DIP
Makes 1 cup
Total time commitment: 10 minutes
Recipe from Adrienneats
400g cooked lentils, drained
1 tsp curry powder
1 tsp Garam Masala
1/4 tsp salt
1/4 tsp red pepper flakes
1 tsp black pepper
1 tbsp tahini
2 tbsp olive oil
Blend everything together. BAM, done.
Friday, March 25, 2011
Gluten Free Friday: The Best Nachos This Side of the Continent
~Today's GFF meal was cooked by Levi, because I've been cooped up with a cold/hayfever all week and was too lazy ill to cook ~
One is from London. We walked everywhere around London that day, made lots of jokes about Tom being our Tom-Tom because he knew where everything was, and posed for some silly photos (see exhibit A)
Did I mention it was THIRTY TWO DEGREES that day? The actual temperature itself isn't shocking (um, hello, I'm from Australia) but the fact that I was in LONDON when it was 32C was a bit weird. It was in the papers the next day. And by the papers, I mean The Sun. Which is hardly a reputable news source.
So the second hurricane glass was from Paris, where Levi and I spent exactly 48 hours, got lost a bit (we walked for the first two hours we got there trying to find a specific metro station), got free entry into The Louvre and the Musee D'Orsay, went all the way back to the Eiffel Tower from the Arc de Triomphe for more banana and nutella crepes, and had Milka chocolate and pint cans of beer for dinner. The second day, we skipped breakfast and headed straight for the Hard Rock Cafe, where we had this esteemed table
That's totally Bob Dylan's harmonica.
So this is where my nacho revival really kicked in - the nachos I had there were the BEST nachos I've ever eaten, and I've had many a nacho in my time. I don't know if it was because I was really hungry, or that they were using French cheese, but OMGA (oh my giddy aunt, get onto that phrase) they were amazing. And I've recreated them at least once a month since.
NACHOOOOS
Serves two really hungry people who will then complain about being too full, or four reasonable people
Total time commitment: 20 minutes
*Apparently some corn chips aren't gluten free, so if you are intolerant I suppose you know what is happening with all that bizniz but check before you eat them*
1 bag corn chips
400g can red kidney beans
Lots of cheese
Salsa and avocado/guacamole, to serve
1. Empty the corn chips into a dish and preheat your oven to 180C.
2. Drain the kidney beans and put them over the corn chips
3. Grate a buttload of cheese onto the top, and put the dish in the oven until the cheese melts
4. Serve with salsa and your chosen medium of avocado.
Tuesday, March 15, 2011
Pumpkin Scones
Do you have an ultimate comfort food that makes you happy, no matter what? For me, comfort food isn't something you make when you're sad, just something that makes you happy when you eat it. It used to be mashed potato until I had a bad incident with instant mash. But pumpkin scones are the BEST, you don't even know. Drop everything and make them immediately.
And with homemade butter? LORDY. Have some with a cup of tea for a mid-afternoon snack. Nuke them for 30 seconds and eat on the way out the door in the morning. Just have some, please. It will enrich your life.
PUMPKIN SCONES
Makes 12 scones
Total time commitment: 40 minutes
Recipe from The Golden Wattle Cookery Book
1 1/2 tbsp butter
3/4 cup sugar
1 egg
1 cup cold mashed pumpkin
2 cups self-raising flour
1. Preheat oven to 180C. Cream butter and sugar together. Add the egg and pumpkin.
2. Add flour and mix well. Pour in heaped tablespoons onto a greased tin and bake for 15 minutes.
Friday, March 11, 2011
Gluten Free Friday: Alycake
Alycake (and Aly, the Vigilante) was the main inspiration behind GFF. I thought that it would suck to not be able to eat gluten, so originally I was going to do gluten-free week to challenge myself to make things that were tasty and quick and non-glutenous. Then I was like, OR I can do something every week. In retrospect, a lot more (continuous) work, but it's fun! Also now that the Uber-Blonde is GF as well, its nice to know that I can always steal recipes from her blog to replicate if I have an uninspired week. Heh.
So guys, this is Aly, eating her Alycakes at Tim Minchin last weekend.
Actually, before I introduce you, can I just take a second to say OH MY GOD TIM MINCHIN WITH AN ORCHESTRA BLEW MY MIND. And that here is a photo of me and Miss Italia dancing (he hadn't even started by this point, we just decided to get our groove on).
Ok, carry on.
ALYCAKES
Makes 12 small cakes
Total time commitment: 40 minutes
Adapted from recipe on the Xylitol website
2 eggs
75g almond meal
75g sugar
Pinch of baking powder
Vanilla essence (see note below)
1. Preheat oven to 180C. Beat eggs and add other ingredients. Mix until smooth, pour into cake tin and bake 15-20 minutes.
TADA.
But seriously, flavour these however you want. I tried orange, as in the original recipe, but it didn't really do it for me. I've done them with no flavouring in the mixture but lemon zest grated on top. Its a pretty stock-standard gluten free recipe, which just means you can keep adapting it to your (or your lucky gluten-free buddy's) tastes! Bravo, recipe. Bravo.
Friday, February 25, 2011
Chickpea Salad Dressing
Have you checked out Shutterbean? I have me some ridiculous amounts of love for that blog, you don't even know, and it all started out with the link to some biscuits. I was like, cool, I'll bookmark that, you know, maybe even check out the archives a bit. BAM! Hours of life gone, loads of recipes bookmarked, lots of smiling reading through Tracy's posts.
As you have *probably* guessed from that intro, this is one of the aforementioned recipes.
I must admit, I'm not really one for salad dressings, but this one really bumped up the salad from a simple, chucked-together side dish to something a little fancier. Because I was literally scraping the jar of Dijon mustard to get the required amount, I poured the leftover dressing into the jar and shook it up so I didn't waste any Dijon. Resourceful, eh?
CHICKPEA SALAD DRESSING
Original recipe from Appetite for Reduction, adapted by Shutterbean
Serves 8 as a side salad or 4 as a main meal
Total time commitment: 15 minutes
SALAD:
400g chickpeas
2 cups pearl cous cous, cooked
Other salad ingredients
DRESSING:
1/4 cup cashew pieces
1/2 cup water
1/4 cup balsamic vinegar
2 tsp Dijon mustard
1. Place cashew pieces in a food processor & blend until chopped. Add the rest of the ingredients and blend until smooth - as you can see from the photo, I didn't have that sort of patience!
2. Toss dressing with salad ingredients and serve.
Labels:
dressing,
easy,
other blogs,
quick,
salad,
savoury,
vegan,
vegetarian
Tuesday, February 22, 2011
Moon Toasties
These are named after one of my favourite late-night eateries (their chips, you don't understand, they are divine), it's pretty much a direct rip-off of their cheese toasties but with added mushrooms for deliciousness. I was planning to make Spanakopita, but forgot to buy spinach and couldn't be bothered going out again after I'd already done my grocery shopping. This is a perfect lazy evening meal.
MOON TOASTIES
Serves 1
Total time commitment: 10 minutes
2 slices of bread
Handful of feta
3-4 mushrooms, chopped roughly
Cheese to taste
Wholegrain mustard
1. Preheat grill at 150C. Heat olive oil in a pan and cook mushrooms until tender. Meanwhile, toast bread.
2. Spread toast with wholegrain mustard (is that sentence even grammatically correct?) and top with crumbled feta, mushrooms and grated cheese.
3. Grill until cheese is melted. Eat. Wonder why you ever cook anything else.
Saturday, February 12, 2011
Tortilla Lasagne
Mum made this for dinner a few weeks ago so I tried to recreate it to feed the Boy and my Producerpants buddy, because we were all fast at work writing short stories on my typewriter about a man named Gordon Crevats. Not for any particular reason, just that we like the clicky-clacky sound of the typewriter. There's also a play being written on the typewriter, every time someone comes over they have to add a line.
I didn't like this version as much as Mum's, she cooked beef in tortilla sauce (if I knew exactly what it was, I would have used it :P) and layered that with vegetables. This was more improvised, and if I make it again (if? when) I'll try beef or vegetarian mince. Then hopefully it won't fall apart quite so much :P
This is Producerpants. We're producing the next pantomime together, and she is delightfully talented and hilarious. We're also a detective team. And we make a lot of bad puns brilliant puns.
I didn't like this version as much as Mum's, she cooked beef in tortilla sauce (if I knew exactly what it was, I would have used it :P) and layered that with vegetables. This was more improvised, and if I make it again (if? when) I'll try beef or vegetarian mince. Then hopefully it won't fall apart quite so much :P
TORTILLA LASAGNE
Serves 6
Total time commitment: 30 minutes
6 tortillas
400g Pinto beans
120g corn kernels
6 button mushrooms, sliced
1 cup diced capsicum (I used red, green and yellow)
1/2 brown onion, diced
1 tsp minced garlic
Chilli flakes
Olive oil
100g salsa
Jalapenos to taste
Cheese to taste
1. Preheat oven to 180C. Cook onion and garlic in a little olive oil. When onion is translucent, add mushroom, capsicum and chilli flakes and cook until tender.
2. Drain beans and corn (I presume you got these in a can) and combine in a large bowl with onion, mushroom, capsicum and salsa. Add jalapenos if you want!
3. Layer two tortillas in a baking dish to make the base of the lasagne. Top with half of the mixture, and repeat so you have three layers of tortilla and two of mixture. Top with cheese and pop in the oven for ten minutes or so. Voila!
Tuesday, October 19, 2010
Tofu noodles
The smell of the stir fry sauce I bought reminds me of summer holidays, because there was one holiday where almost every day for lunch I made these. Minus the tofu, though, I wasn't quite as adventurous then. I still haven't found a really good way to cook tofu, so hit me up with suggestions!
2. Boil the kettle and pour it over the Hokkien noodles for a couple of minutes, to let them separate.
I've spent today watching Criminal Minds and snacking on Subway cookies (white chocolate and macadamia, natch). I probably should have started studying for exams, but I love Matthew Gray Gubler too much. Also, uh, I study psychology, so that counts... right?
Also, while I have your attention, how adorable are these chopsticks? The Boy got them for me for my birthday, along with heart-shaped measuring spoons. I think my adorable kitchen things need their own entire blog post, js.
TOFU NOODLES
Serves four
Also, while I have your attention, how adorable are these chopsticks? The Boy got them for me for my birthday, along with heart-shaped measuring spoons. I think my adorable kitchen things need their own entire blog post, js.
TOFU NOODLES
Serves four
220g Hokkien Noodles
Stir fry vegetables - these can be frozen or fresh. I used mushrooms, carrot, peas, green beans and capsicum.
300g firm tofu, cubed
Stir Fry sauce/seasoning
1. Chop up the vegetables (unless you have pre-cut frozen ones - lucky you!) and fry them in the pan with the cubed tofu
Surprise! Process photo!
2. Boil the kettle and pour it over the Hokkien noodles for a couple of minutes, to let them separate.
3. Pour the sauce over the noodles and let that simmer in its own goodness for a spell
4. Add the noodles, mix it all together, and there you have it! I had a spicy sauce so (having learnt from previous summer lunches) threw some natural yoghurt on the top to balance it out.
Wednesday, October 13, 2010
Spicy Cous Cous
Hey Em, what'd you get up to yesterday?
Oh, you know, not a lot, went to uni and got APPLAUSE for the gosh-darn Facebook pages I photoshopped for Juliet Capulet and Count Paris, and then came home and made some SWEET-ASS spicy cous cous for me and Mama and Tara, then got picked up by Gordo to go see SMASHING PUMPKINS. LIKE A BOSS. Just chillin' on a Tuesday night at Smashing Pumpkins, you know how it is.
SPICY COUS COUS
Serves 4
2 cups cous cous
Lotsa pepperoni
Traffic light capsicum (one green, one yellow, one red)
100g black olives
Feta
1. Cut the capsicums into strips, cut the pepperoni into little circles, and fry those bad boys in some olive oil until they're char-grilled.
2. Put 1/2 cup of dry cous cous in each bowl and pour boiling water over until it just covers the cous cous. Cover with a lid or something so it can cook for a few minutes.
3. Drizzle some olive oil over the cous cous and use a fork to make it fluffy. Top with the capsicum, pepperoni, olives and feta and NOM DOWN.
Sunday, October 3, 2010
Taco Night!
This is something T & I are hoping to make a weekly thing. Which will probably happen because I love tacos, and they are so gosh-darn simple to make! I realised we didn't have any seasoning when I got home, so I invented some, and I'm going to go all P-Dubz and show you photos of each step. Because I like that about her recipes.
TACO SEASONING
1. Put some minced or crushed garlic into a bowl and cover with Sumac. Sprinkle on some chilli flakes, salt and pepper

3. Combine it all unti it looks gross like this and is to your tastes.
Then you just add it to some browned mince! I think I'll have to refine this later, but it wasn't horrendous. And this is what the plate looked like (sans mince):
Thursday, September 16, 2010
Summer Lunch & "pulling a Nigella"
Money has been kind of tight lately, since I booked flights for Boyfriend & I to go over east in January for my gorgeous cousin's 21st and to see AM! *squee* Also, I had to buy ink for the printer this week. Who knew it was so expensive? Luckily, the weather has been delightful enough to get away with snacking on fresh fruit & vegetables all day and sustaining myself with leftovers from Tara's pasta bake at night :)
I've been meaning to post lately but considering I've been having Tara's pasta bake and the delicious deli-counter fiesta of a pasta that Boy & I created almost exclusively, I don't want to pull a Nigella.
The phrase originated on Saturday when the Uber-Blonde and I were discussing our shared love of Jamie Oliver. I mentioned that I liked Nigella Lawson (she had an episode on comfort food where she made mashed potato and gravy, what is not to love?!). UB disagreed, saying she watched an episode of one of her shows marketed as an "Oh, working mothers, you have no time to cook, but make these nutritious meals for your family!"-type gig, and proceeded to make pasta tossed with a jar of antipasto vegetables and olive oil.
For the record, that is almost identical to the deli-counter fiesta, but as the name suggests we get olives, sundried tomato and stuffed peppers from the deli counter and have that with feta and pasta. NOM. Hence, posting that recipe would be somewhat "pulling a Nigella".
Much like the following recipe, in fact!
AMAZING SUMMER LUNCH
1 avocado per person
Salt and Pepper
1. Cut the avocado in half and remove the stone
2. Season with salt and pepper.
3. Nom down like it's nobody's business.
Saturday, September 11, 2010
Macaroni Cheese
See, I promised, didn't I?

MACARONI CHEESE
Serves four very hungry students
400g pasta
Double quantity of white sauce
MOAR CHEESE
1. Cook the pasta while you make the white sauce, and get the oven to preheat at 180C while you do that. This is the hardest step! So much to coordinate!
2. Put the pasta into a baking dish.
3. Pour the sauce over the pasta.
4. Grate some more cheese on the top
5. Put it in the oven and wait for it to delicious itself.
Subscribe to:
Posts (Atom)


